Inspiration
The "other bird" in the Heartfelt Creations Springtime Cardinals release is the one on this card - a mother bird feeding her chicks. You could color this one almost any color! When I am choosing colors, I often start with the paper on hand. For this one, I started with a patterned paper I liked from the Linen Closet pack from DCWV. I found a solid blue cardstock that was a close match, then chose my COPIC colors to go with it. Here is the result, which was featured on the HC Blog on 5/4/2011.

Ingredients
Note: Finished Card Size: 4” x 5 1/2”
Paper
| Linen Closet (DCWV) | 5 1/2” x 8 1/2”, scored at 4 1/4” |
| Blue Bayou (SU!) | 4 1/4” x 5 1/2” |
| Soft Sky (SU!) | 5 1/2” x 8 1/2” |
| Stamper's Select White (PTI) | 4 1/4” x 5 1/2”; plus a small scrap |
Inks
| Memento Tuxedo Black (Tsukineko) |
| Soft Sky (SU!) |
| Blue Bayou (SU!) |
Stamps
| HCPC 3385 Spring Birdies and Roses Precut Set (Heartfelt Creations) |
| HCPC 3384 Cardinal Posy Wreath Precut Set (Heartfelt Creations) |
Accessories
| Label 8 Nestabilities (Spellbinders) |
| Scalloped Oval Nestabilities (Spellbinders) |
| Plain Oval Nestabilities (Spellbinders) |
| Grand Calibur (Spellbinders) |
| COPIC Markers (Imagination International) |
| Bow-Easy |
| White gauze ribbon |
| Scalloped oval punch (SU!) |
| Scor-Pal |
| ATG 714 (Scotch) |
| Rotary Trimmer (Fiskars) |
Instructions
Base Card
Use the patterned paper for the base card - score and fold. Place the Label 8 Nestabilities die just below the fold, and cut out the card with the die cut machine.
Image
Stamp the bluebird family image on white. Color with COPIC markers. Here are the colors I used:
- Birds: BG70, BG72, BG75, Y15
- Worm/Baby Bird Mouths: YR02
- Roses: R81, R83, R85
- Leaves: G82, G85
- Branch: E55, E57
Cut and emboss the image using a plain oval Nestabilities die. I thought the white cardstock was kind of stark, so I used a sponge and the light blue ink to shade the background of the oval, but I didn't want to sponge over the image, so I used the masking technique. To do this:
- Stamp the image on a scrap of cardstock, and carefully cut it out, including the spaces between the leaves.

- Cover the image with the mask.

- Sponge light blue ink around the image.

Assembly
Cut and emboss a scalloped circle from the dark blue paper. Mount the image oval on the scalloped oval, and add it to the front of the card.
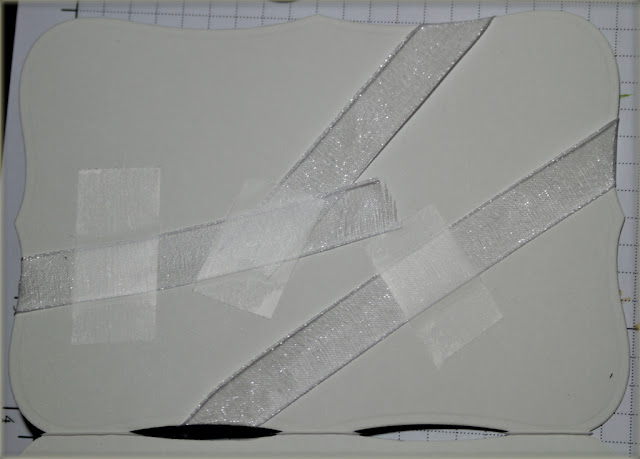
Since the card has an opening at the top, wrap the ribbon around opposite corners of the card front and taped it in the back.
To cover the taped ribbon and create the inside greeting, cut and emboss two smaller Label 8 dies - mount one on each of the inside surfaces.

Stamp the sentiment in dark blue on white paper, and punch it out with the scalloped oval punch. Mount the sentiment on the light blue surface inside the card. 
To finish it off, tie a bow (mine has multiple loops), and add it to the card front.
Thanks for stopping by!


1 comment:
Thanks for the tutorial. I can tell a lot of work and love went into this card. Just gorgeous!
Post a Comment
Your kind comments make my day!