Wednesday, March 30, 2011

Star Celebration

Inspiration

Here's a card for a coworker who has an April Fool's Day birthday - It is VERY easy! The only stamping is the sentiment - the rest is just choosing coordinating papers, then cut-punch-paste!

20110330_StarCelebration

Ingredients

Note: Finished card size is 4 1/4” x 5 1/2”

Paper

Kraft (SU!) 4 1/4” x 11”, scored at 5 1/2"
3/4" x 3"
Naturals Paper Stack patterned paper(DCWV) dark lined pattern 4 1/8" x 5 3/8"
and 2" x 2"
circle pattern 3 1/8" x 5 1/2"
tan paper 4 1/2" x 4 1/2"
and 2" x 2"
Very Vanilla (SU!) 1/2” x 2”

Inks

Early Espresso (SU!)

Stamps

Starring You (SU!)

Accessories

Star Nestabilities(Spellbinders)
Grand Calibur (Spellbinders)
Copper Sheeting
Scor-Pal
Adhesive Transfer Gun 714 (Scotch)
Rotary trimmer with straight blades (Fiskars)
Circle punches - 1 3/4", 1 3/8", and 1" (SU!)

Instructions

Sentiment

Stamp the sentiment in brown ink on the small vanilla strip.

Clip the ends of the small Kraft strip to make a flag, and mount the vanilla on the Kraft.

Star

Cut and emboss the star from the tan paper, using the largest star Nestabilities die.

Punch a 1 3/4" circle from the dark striped paper, and a 1 3/8" circle from the tan paper.

Punch a 1" circle from the copper sheeting.

Now mount the graduated circle in order, from largest to smallest, in the middle of the star.

Assembly

The assembly goes quickly at this point:

  • Mount the dark patterned paper on the base
  • Mount the circled patterned paper centered over the dark paper
  • Mount the star stack on the upper portion of the card
  • Mount the sentiment stack on the lower left area of the card

Final Notes

Inside I put another vanilla panel, measuring 4 1/8" x 5 3/8", with a greeting stamped in the same brown ink.

It makes a very nice, masculine card, don't you think?

Thanks for stopping by!

Orange_Green_Sign

Sunday, March 27, 2011

Tea Party Invite “Reject”

Inspiration

Another late night post, but still on Sunday!  In my last post, I told you about the tea party invitation order I was working on – I’ve spent most of the last 24 hours completing those 57 cards, and I’m finally done (yea!).  The post last Wednesday was the card design that was chosen by the shower hostess.  Here’s the other design I did in the same paper that I will use in different colors for some other occasion.  It uses a new dies I picked up at a stamp show in January – they are called “Geo-Dies”.  They are really intricate dies that, after cutting out the pattern, you fold part of the die cut to create a really beautiful result.

20110327_TeaPartyInviteReject_Outside

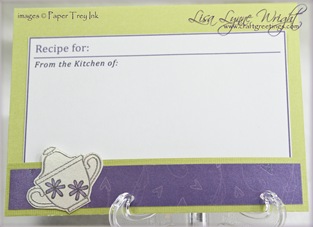
Remember, I also needed to create a pocket on the inside for a recipe card.  Here’s the inside, which also uses a Geo-Die.

20110327_TeaPartyInviteReject_Inside 

Ingredients

Note: Finished card size is 4 1/4” x 5 1/2”

Paper

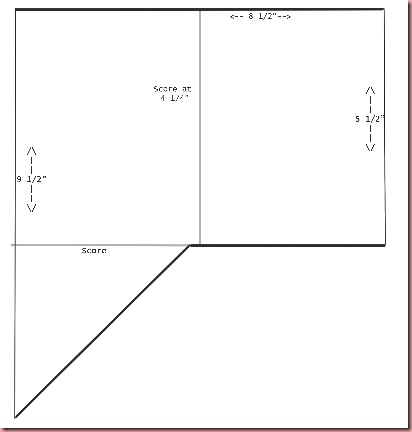
Green #3 Textured Cardstock(DCWV):  12” x 12”, cut and scored to pattern below
Lavender Lace (SU!):  1” x 3 1/2”, and 3 1/2” x 3 1/2” (for inside)
Playful Heart Shimmer Glitter paper (Heidi Grace):  4” x 4”, cut with scallop blade
White Silver Metallics (Wausau):  4” x 4”, and 3” x 6” (for inside)
Stamper's Select White (PaperTrey Ink):  4” x 4”, and 3/4” x 3 3/4”

Inks

Lavender Lace (SU!) Versamark (Tsukineko)

Stamps

Tea for Two (Paper Trey Ink) Floral Tea (Mark's Finest Papers)

Accessories

COPIC Markers (Imagination International) Bow-Easy
Geo Dies(Pop-Ups, Etc.) Grand Calibur (Spellbinders)
Dandelion Green Ribbon (Lasting Impressions) Heat Gun
Silver embossing powder (Sweet Stamps) Glue Dots
Geo-Dies((POP-UPs, Etc.) Scissors
Adhesive Transfer Gun 714 (Scotch) Scor-Pal
Rotary trimmer with scallop and straight blades (Fiskars)

Instructions Pattern

Base Card

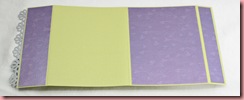
Since the cardstock is 12" x 12", I was able to get 2 cards out of each sheet. However, cutting it out was a little tricky – I needed to create the inside pocket.  Here’s the pattern I used.  

To create the pocket, simply put adhesive along the left edge of the triangle, and fold the triangle up along the score line.  This will adhere the pocket along the outside edge of the card.

Images

Stamp the tea pot and tea cup images with embossing ink on the white card stock, and emboss with silver powder. Color the images with COPIC markers. I kept it very simple, and only used V20, YG25, and E31.

Cut a small strip of white paper using the scalloped blade, measuring 3/4” x 3 1/4”, and stamp the sentiment in lavender on it.

Assembly

Cut a circular pattern in silver using the Geo-Die, and fold per the directions.  Cut the long patterned paper in silver, and fold.

Mount the scalloped patterned paper square on the front of the card, followed by the circular die cut.  Mount the trimmed tea pot in the center of the silver die cut. Tie a pretty green bow, and add it using a glue dot.

Mount a solid lavender panel below the bow, and add the white sentiment strip on it.

Mount a lavender triangle on the pocket, and then add the long silver die cut so that it covers both the edge of the triangle and the edge of the pocket.  Add the teacup image on top.

Invitation 

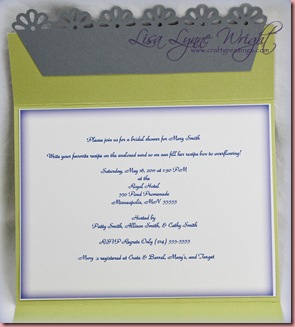
For the invitation text, I again printed the information in purple ink using the computer and mounted it facing the pocket.

Thanks for stopping by!

Coral_Purple_Sign

Thursday, March 24, 2011

Tea Party Shower Invitation

Inspiration

Well it is technically Thursday morning, but this is my Wednesday post, since I’ve been awake since about 5 AM Wednesday morning.  This is a project I've been working on for a friend whose niece is getting married. My friend is hosting the bridal shower for almost 60 people(!!!!) and she asked me to make the invitations. I'm posting this before I get them all made - they are due 3/28, so you know what I'll be doing the next few days (LOL!)

Here are the parameters she gave me for the project:

  • The bride's colors are lavender, citron green, and silver
  • The shower theme is a tea party
  • They wanted to enclose a blank recipe card so each guest could bring it to the shower filled out with a favorite recipe

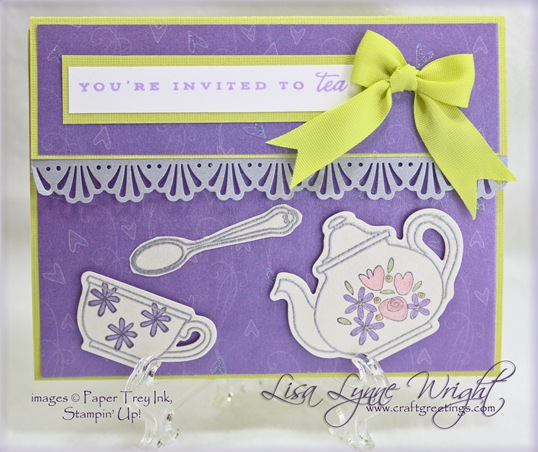
In choosing my materials, oddly enough I started with the ribbon! I found the silky citron green ribbon half price at the Stamp Scrap Art Tour in Mesquite, TX, in January. From there I found paper at Joann's that was as close a match to the ribbon as I would EVER thought I could find. The lavender paper is also from Joann's - it has shiny little hearts in the pattern that make it perfect for a bridal shower. I did two different card designs - I'll post the "reject" some other time. Here's the design that the hostess chose.

20110323_TeaPartyInvite_Outside

Ingredients

Note: Finished card size is 4 1/4” x 5 1/2”

Paper

Green #3 Textured Cardstock(DCWV):  5 1/2” x 11”, scored at 1”, 5 1/8”, and 9 3/8”
Green #3 Textured Cardstock(DCWV):  3 5/8” x 3/4”
Whisper White (SU!):  3” x 3”
Playful Heart Shimmer Glitter paper (Heidi Grace):  5 3/8” x 4”
Playful Heart Shimmer Glitter paper (Heidi Grace):  5 3/8” x 1 1/2”
Playful Heart Shimmer Glitter paper (Heidi Grace):  5 3/8” x 3/4”
Champagne Pearl Mettalics (Wausau):  3” x 3”
White Silver Mettalics (Wausau):  5 3/8” x 1 1/4”

Inks

Basic Gray (SU!) Lavender Lace (SU!)
Versamark (Tsukineko)

Stamps

Tea for Two (Paper Trey Ink) Tea for Two Additions(Paper Trey Ink)
Basket Full of Fun (SU!)  

Accessories

Dandelion Green Ribbon (Lasting Impressions) Bow-Easy
Tea for Two dies (Paper Trey Ink) Cuttlebug (Provo Craft)
Silver embossing powder (Sweet Stamps) Heat Gun
Edge punch (Martha Stewart) Foam Tape
Glue dots Scissors
Scor-Pal Adhesive Transfer Gun 714 (Scotch)
Markers: Lavender Lace, Sunshine Yellow, Pink Pirouette, Certainly Celery (SU!)
Rotary trimmer with deckle and straight blades (Fiskars)

Instructions

Base Card

Since the cardstock is 12" x 12", I was able to get 2 cards out of each sheet, 20110323_TeaPartyInvite_Trimmedjpgwith a 1" strip for extra use - like the mat for the sentiment.

After cutting and scoring the base green card, mount the purple pieces onto the three sections of the card, leaving the back panel open.

Punch the strip of silver paper along one edge, and adhere it to the underside of the the top panel.

20110323_TeaPartyInvite_InsideFold the card along the score lines. Add adhesive on the outer edges of the narrow front panel, and fold it inward. This forms the pocket to hold the recipe card.


Images

Stamp the tea party images with embossing ink on the Champagne card stock, and emboss with silver powder. Stamp the flowers in the middle of the teapot image in gray, and color the flowers with markers. Using the matching dies, cut out the teapot and teacup using the die cut machine; cut the remaining images out by hand.

Stamp sentiment for the front of the card in purple on the small white strip, and mount it on the small green paper mat.

Assembly

The assembly goes quickly at this point - arrange the tea party images on the front (except the sugar bowl), and attach with foam tape. Adhere the sugar bowl on the pocket inside the card, slightly to the right. Mount the matted sentiment on the upper flap on the front of the card. Tie a pretty green bow, and add it using a glue dot.20110323_TeaPartyInvite_Inside2

Final Notes

Inside

Now, I like to do custom greetings inside using my computer - after getting the details on the shower, I used PhotoShop to create a text box with shaded border, picked a pretty font - trying to match the purple color of course! Print/trim/paste and you're done!

Thanks for stopping by!

Coral_Purple_Sign

Sunday, March 20, 2011

Rock Star Birthday

Inspiration 20110320_RockStar

Well, I'm getting started on my April cards - and one of the first is a young man who LOVES music. I saw this new Stampavie stamp in the craft store on Friday, and immediately thought of Patrick (I'm sure he doesn't ready my blog, so I'm going to show it today).

Then to choose a layout, I went to the SCS Sketch Challenge, and found challenge 322. This is a fun card - one that can be made in a short period of time. Hope you enjoy!

Ingredients

Note: Finished card size is 4 1/4” x 5 1/2”

Paper

Brilliant Blue (SU!):  4 1/4” x 11”, scored at 5 1/2”
Jackpot DSP (SU!):  1 3/4” x 5”, plus a 3” x 4” piece
Yo Yo Yellow (SU!):  1 3/4” x 4 3/4”, plus a 3” x 4” piece, and a 2” x 2” square
Real Red (SU!):  3” x 4 3/4”
Stamper's Select White (Paper Trey Ink):  3” x 4”
Whisper White (SU!):  3” x 3”

Inks

Memento Tuxedo Black (Tsukineko) Real Red (SU!)
Brilliant Blue (SU!)

Stamps

I'm a Rock Star! (Stampavie) Rock Star (Inkadinkado)

Accessories

Classic Ovals (Small) Nestabilities (Spellbinders) Grand Calibur (Spellbinders)
Deckled Ovals (Large) Nestabilities (Spellbinders) Star Punch (SU!)
COPIC Markers (Imagination International) Scissors
Adhesive Transfer Gun 714 (Scotch) Scor-Pal
Rotary trimmer with straight blade (Fiskars)

Instructions

Image

Stamp the rock star on the large white panel, using black ink. Color with COPICS, and trim the image closely.

Here are the COPIC colors I used:

Jeans B0000, B32, B34
T-Shirt B34, B37
Shirt Y0000, Y08
Guitar R0000, R46
Skin E000, E00, RV10
Hair E41, E43, E47
Shoes W00, W2

Sentiment

Stamp the sentiment twice on the lighter weight white paper - once in red, and once in blue. Then cut out the blue word "rock", and the red word "star".

Punch a star out of yellow paper, and attach the words to the star.

Assembly

Step 1: Mount the long patterned paper rectangle on the card front, followed by the yellow rectangle, and the large red rectangle.

Step 2: Cut a deckled oval from the patterned paper, and a plain oval from yellow paper. Run the yellow oval through the die cutter again to emboss it.

Step 3: Mount the patterned oval, and yellow oval on top of the large red rectangle.

Step 3: Add the rock star on the yellow oval.

Step 3: Finish it off with the star sentiment in the lower left corner.20110320_RockStar_Inside

Final Touches

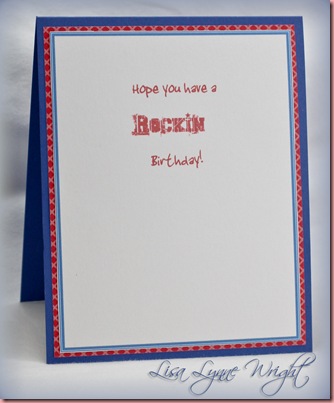
I often use the computer to generate a unique saying for the inside of cards - there are so many cool fonts available, it's fun to find one to match the theme of greeting.

For this card I used Microsoft Word to create a text box, with blue borders, and a red greeting with a "rock star" font for the word "rockin'."

I cut another patterned paper panel, measuring 4" x 5 1/4", and mounted it inside. I closely trimmed the text box, and added it on top of the patterned panel.

Thanks for stopping by!

Coral_Purple_Sign

Wednesday, March 16, 2011

Quick and Easy

Inspiration

Ever had a week where you just don't have time to get everything done you want to do? Like every week, right? This is one of those weeks for me - I have lots of "have to do's (work, house work, etc.)", and lots of "get to do's (Heartfelt Creations design team submission, Tommy Tune musical, Photoshop training, HTML/CSS class)", plus a ton of "want to do's (card making, studying, supporting Joe's business, etc., etc., etc.)" things - something for sure won't get done. LOL! But reviewing the list DOES make me count my blessings instead of my burdens.

With that in mind, these two cards are made with a major time-saver set of stamps from Gina K Designs - they are decorated frames that coordinate with Spellbinders Nestabilities dies. Since they are already decorated, you don't need much time or many materials to make nice, quick greetings (and a quick blog entry)!

Card One - Fabulous Frame

20110316_FabulousFrame

Ingredients

Note: Finished card size is 4 1/4” x 5 1/2”

Paper

Ruby Red (SU!):  4 1/4” x 11”, scored at 5 1/2”
English Garden DSP (SU!):  4” x 5 1/4”
Whisper White (SU!):  3” x 3”

Inks

Ruby Red (SU!)

Stamps

Lovely Labels (Gina K) Simply Said (Unity)

Accessories

Labels 9 Nestabilities (Spellbinders) Grand Calibur (Spellbinders)
Ribbon and Foam Tape Scissors
Scor-Pal Adhesive Transfer Gun 714 (Scotch)
Rotary trimmer with deckle and straight blades (Fiskars)

Instructions

Step 1: Stamp the decorated label on the white cardstock in red, and then add the sentiment in the middle of the open space in the label.

Step 2: Create the label using the Label 9 die - run it through the die cut machine twice - once to cut, once to emboss.

Step 3: Mount a ribbon with a tied not around the middle of the patterned paper panel.

Step 4: Mount the patterned paper with the ribbon to the front of the card.

Step 5: Add the stamped label, using foam tape for a little bit of dimension.

Card Two - Wasabi Wishes

20110316_WasabiWishes

Ingredients

Note: Finished card size is 4 1/4” x 5 1/2”

Paper

Wild Wasabi (SU!):  4 1/4” x 11”, scored at 5 1/2”
Linen Closet Patterned Cardstock (DCWV):  4” x 5 1/4”
Whisper White (SU!):  3” x 4”

Inks

Wild Wasabi (SU!)

Stamps

Lovely Labels (Gina K) Elegant Post (Gina K)

Accessories

Labels 4 Nestabilities (Spellbinders) Grand Calibur (Spellbinders)
Pearl Stickers (Recollections) Foam Tape
Scor-Pal Adhesive Transfer Gun 714 (Scotch)
Rotary trimmer with deckle and straight blades (Fiskars)

Instructions

Step 1: Stamp the decorated label on the white cardstock in green, and then add the sentiment in the middle of the open space in the label.

Step 2: Create the label using the Label 4 die - run it through the die cut machine twice - once to cut, once to emboss.

Step 3: Mount the patterned paper panel on the front of the card.

Step 4: Add the stamped label, using foam tape for a little bit of dimension.

Step 5: Add matching pearl stickers in the design on the label.

Final Notes

Hope this shows you quick & easy can still be really nice – and the recipient always appreciates the card, no matter how simple.

Thanks for stopping by!

Coral_Purple_Sign

Sunday, March 13, 2011

Sunset Sail

20110313_SunsetSailInspiration

I usually have to cast around to find ideas for a masculine theme for cards. Here’s one that came to me as I searched through seldom-used stamps for ideas to use on the several March birthdays that require a masculine touch. 

Of course, the technique is from Michelle Zindorf – on this one, I used a sponge instead of the brayer to create a color gradient across the card. I also came across a technique on Splitcoast Stampers that incorporates COPICs and colored pencils (2 of my favorite ways to color images) on the same image.


Ingredients

Note: Finished card size is 4 1/4” x 5 1/2”

Paper

Bashful Blue (SU!):  5 1/2” x 8 1/2”, scored at 4 1/4”

Whisper White (SU!):  4 1/8” x 5 3/8”

Stamper’s Select White (Paper Trey):  4 1/8” x 5 3/8”

Inks

Versamark (Tsukineko)

Memento Tuxedo Black (Tsukineko)
Apricot Appeal (SU!) Bashful Blue (SU!)
Pumpkin Pie (SU!) Brilliant Blue (SU!)
Dusty Durango (SU!)  

Stamps

Medallion (SU!)

On Your Birthday (SU!)

Seagull (CC Rubber Stamps)

Sailboat (PSX)

Sand (CC Rubber Stamps)


Accessories

Colored Pencils (Prisma Color)

Gamsol and paper stubs

COPIC markers (Imagination International)

Clear embossing powder

Sponge

Heat Gun

Scor-Pal

Adhesive Transfer Gun 714 (Scotch)

Rotary trimmer with deckle and straight blades (Fiskars)

Instructions

Sunset and Sea 

Step 1: Stamp the medallion sun in embossing ink on the left side of the white panel and emboss with clear powder.

Step 2: Sponge the sunset colors starting with the lightest orange color over the upper left 2/3 of the card.  Add the darker orange colors to create a gradual darkening in color as you move away from the sun.  After sponging on the color, you may want to “polish” the sun with a paper towel – this will remove some of the orange color from the embossed image, but still leaves a glow.

Step 3: Sponge the sea using the blue inks, again going from lighter near the sun to darker in the lower right corner of the card.

Step 4: Stamp the sand dots over the sea with the darkest blue color to add a little texture and movement to the water.

Step 5: Stamp the sentiment and the bird in black to the right of the sun.

Sailboat

Step 1: Stamp the sailboat on the heavier white cardstock using the black ink.  My sailboat image also has clouds and water – when I cut the image out, I eliminated the clouds – nothing to “block out” the sun!  I left the water around the boat as part of the image.

Step 2: Color the image with COPICs.  I used these colors:

  • Sails: BG0000
  • Boat: E30, E31, E37

Step 3: Add color shading using the colored pencils, and blend with mineral spirits and a paper stub.  I did all of the color for the water with pencils, but you could easily pick a blue shade of marker to lay the base color for the water.

Assembly

Step 1: Mount the sunset panel to the front of the card.

Step 2: Add the sailboat, using foam tape for a little bit of dimension.

Thanks for stopping by!

Coral_Purple_Sign

Wednesday, March 9, 2011

Sympathy From Friends

Inspiration

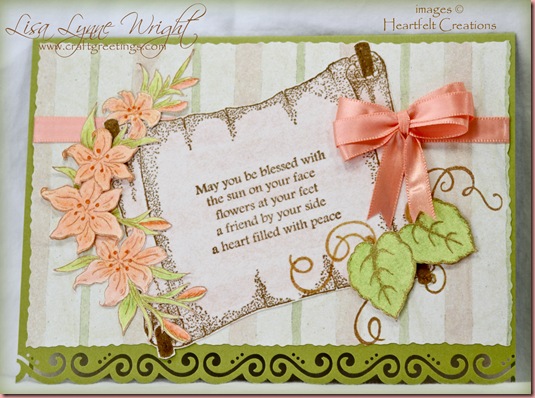
I used this as my third project submittal to the Heartfelt Creations design team contest. This card was created for a coworker who had lost his father-in-law, and has many close friends in our workplace. I wanted something that would be big enough for several people to sign, and would let my friend and his wife know they have the support of the friends he sees every day at work.

LisaLynneWright_HFCDesignSubmission_Project1_Sympathy

Ingredients

Note: Finished card size is 5” x 7”

Paper

  Kiwi Kiss (SU!)

  7” x 10”, scored at 5”

  Soft Serenity patterned paper (Provo Craft)

  4 1/4” x 6 7/8”

  Very Vanilla (SU!)

  4 1/4” x 5 1/2”

  Vellum (unknown)

  4 1/4” x 4

Inks

  Soft Suede (SU!)

Creamy Caramel (SU!)

Stamps

  Ancient Scroll (Heartfelt Creations)

Easter Lilies (Heartfelt Creations)

  Wrought Iron Cross (Heartfelt Creations)

Leafy Swirls (Heartfelt Creations)

Accessories

  Colored Pencils (Prisma Color)

Gamsol and paper stubs

  Edge Punch (EK Success)

SPICA glitter pens (Imagination International)

  Bow Easy

Foam tape

  Ribbon (Michaels)

Glue dots

  Scor-Pal

Adhesive Transfer Gun 714 (Scotch)

  Rotary trimmer with deckle and straight blades (Fiskars)

Instructions

Step 1: Stamp the lilies on the vanilla cardstock using the caramel ink. Color with pencils, and blend with mineral spirits and paper stumps. Embellish the flowers with glitter pens. Trim the image closely.

Step 2: Stamp the scroll on Vellum in the suede ink, and the sentiment in the middle of the scroll in the same ink. Let the ink dry, then cut the scroll out.

Step 3: Cut and score the base green card. Use the edge punch to shape the bottom edge of the front of the card.

Step 4: Using the deckle blade cut the patterned paper. Add a piece of ribbon horizontally across the patterned panel, and adhere the panel to the front of the card.

Step 5: Stamp the leaves in caramel on the lower corner of the scroll, and embellish with a gold glitter pen. Stamp the leaves again on a piece of vanilla cardstock, and color the leaves with pencils and blend with mineral spirits. Cut the leaves out, and mount them over the image on the scroll with foam tape.

Step 6: Mount the lilies image on the left of the scroll with foam tape.

Step 7: Tie a double-loop bow using the Bow-Easy, and mount with a glue dot on the right of the scroll on the ribbon line.

Final Notes

This card could easily be used for an Easter card, or anytime you have someone who needs some encouragement.

Thanks for stopping by!

Coral_Purple_Sign

Sunday, March 6, 2011

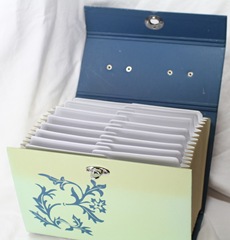
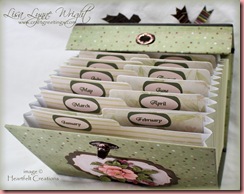
Altered Greeting Card Box

This was my second submission for the Heartfelt Creations design team – when I visited the current design team’s blog hop yesterday, I found Angelica Turner’s project using the same stamp – She does a beautiful work!

InspirationLisaLynneWright_HFCDesignSubmission_Project3_AlteredOutside
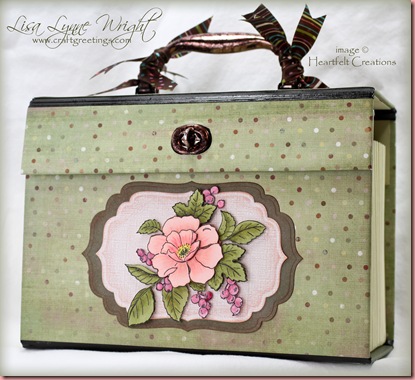
Altered projects are especially difficult for me – I do so many cards, that my first impulse is always to make a card. But when I came across a beat-up accordion file at the local office supply store, I knew I could make something of it.

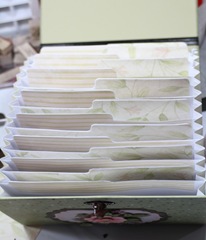
Since I do make cards every week, I’ve always needed a smart way to organize them. So, I turned this into a file for cards – a slot for each month, and a few extra slots for general cards – baby, wedding, etc. LisaLynneWright_HFCDesignSubmission_Project3_AlteredInside
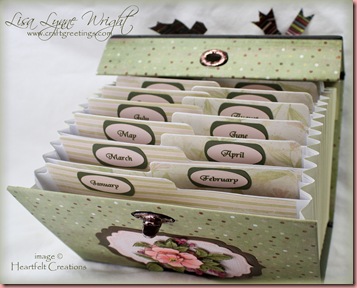
In deciding on the image for the front, I picked the floral image that first drew me to Heartfelt Creations – I saw it at a stamp show and had to add it to my collection of floral stamps!

It was quite a project! It took me one evening, plus another whole day – but I really like the outcome.

Hope you do too!


Ingredients

Paper

Green/Small Dots (My Mind’s Eye)

Wild Asparagus/Pink/Tan Strips (My Mind’s Eye)

Soft Serenity patterned paper (Provo Craft)

Basic Black (SU!)

Always Artichoke (SU!)

River Rock (SU!)

Blush Blossom (SU!)

Whitewash Wicker Chair (Core’dinations)

Stamper’s Select White (Paper Trey Ink)


Inks

Memento Tuxedo Black (Tsukineko)

Really Rust (SU!)

Stamps

Autumn Corsage (Heartfelt Creations)


Accessories

COPIC markers (Imagination International)

SPICA glitter pens (Imagination International)

Grand Label 4 dies

Sponge

Grand Calibur die cut machine (Spellbinders)

Sandpaper

Gold embossing powder (Stampendous)

Anita’s Glossy Black craft paint

Adirondack Alcohol ink (Ranger)

Crystal Effects lacquer (SU!)

Ribbon (Hobby Lobby)

Foam tape

Medium oval punch (SU!)

Corner rounder punch (SU!)

Small oval punch (SU!)

Clear address labels (Avery)

Key Tag punch (SU!)

Scissors

Paint brushes, foam brush

Rotary trimmer with straight blade (Fiskars)

Adhesive Transfer Gun 714 (Scotch)


Instructions

Here’s the before pictures – pretty ugly! It had actually yellowed with age, and was all scratched and dented.  AlteredCardFile_S01_Final
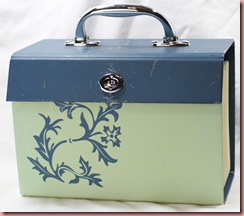
AlteredCardFile_S02_Final

The inside was in very good shape – nice and clean, but very very plain. AlteredCardFile_S03_Final
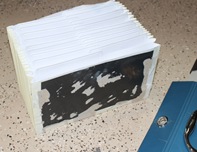
Step 1: I tore it apart! Well, I carefully tore out the accordion file. 


Step 2: I sanded the outside of the cover. This took several hours – much tougher than I expected. I found as IAlteredCardFile_S04_Final sanded that the yellowing had occurred because there was a plastic film over the whole thing. It came off as I sanded. 


Step 3: Instead of trying to cover the folds with AlteredCardFile_S05_Finalpaper, I painted them with the black paint.
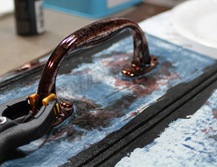
I used alcohol inks to color the hardware – I used the Mushroom and Cranberry colors, and
applied the mix with a felt square.

I used a small paintbrush to paint black around the edges of the hardware, so the original blue paper wouldn’t show through.


Step 4: Next, I covered the sections with paper. I used the small dots paper on all the panels, except the bottom, on which I used solid dark green. I used the oval punch to get the opening around the clasp. The handle was tougher – I ended up punching ovals in black paper rectangles to cover the seams in the patterned paper. AlteredCardFile_S07_Final

Inside, I used the solid light green paper.

Note – when you cut the paper to cover the panels, leave plenty of extra for the edges. This box was 10 inches wide, so the 12” x 12” patterned paper had the perfect extra for folding to the inside.
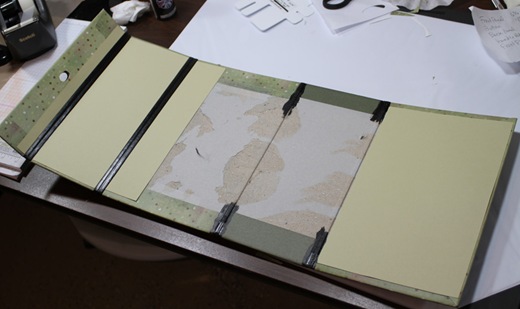
AlteredCardFile_S08_Final

Step 5: For the tabs, I didn’t want to leave them plain white. So I measure the tabs, and cut out AlteredCardFile_S09_Final 2 patterns of paper to create alternating tabs. I used the corner rounder punch to match the rounded tab corners of the accordion file.
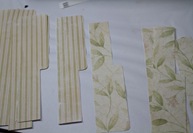
I mounted the paper to the front of each tab.

AlteredCardFile_S10_Final

Step 6: I built the flowers into layers, so I stamped it 3 times on the white cardstock. I colored the images with COPICs, using these colors: Y11, Y13, R30, R32, R35, R81, R89, YG93, and YG97. I added glitter to the image with SPICAs, using Mint, Peach, and Buttermilk.
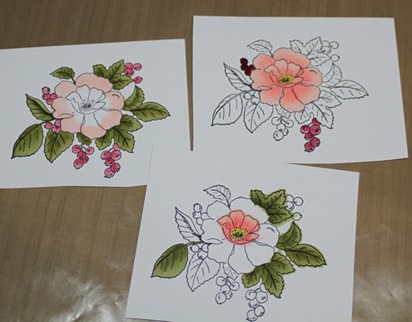
AlteredCardFile_S12_FinalAlteredCardFile_S13_Final

Then I cut out the images in pieces, trimming each one very closely. I painted the red berries with the clear lacquer paint to make them shine.


Step 7: I cut and embossed a dark green Grand Label 4, and sponged the edges with rust ink. Then I cut the next smallest die out of the Core’dinations cardstock, and sanded the edges. The images are mounted with foam tape, and each piece stacked on its’ base image. AlteredCardFile_S14_Final
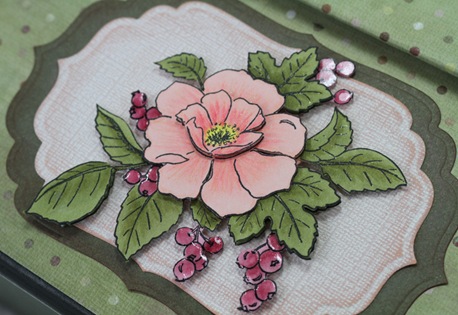
AlteredCardFile_S15_Final

Step 8: I remounted the accordion file in the cover. 

Step 9: I printed the labels in green, using clear return address labels. Then I put the label on the blush cardstock, and punch them out with a small oval punch. The green mat is punched out with the key tag punch. I mounted each label on a green mat label, then adhered the final label to a tab.

AlteredCardFile_S16_Final

Step 10: The finishing touch was tying some ribbons around the handle – I found some brown ribbon with small dots in green and pink, and matching strips on the reverse side.

Here’s another look at the final result - Thanks for sticking with me through all the steps!
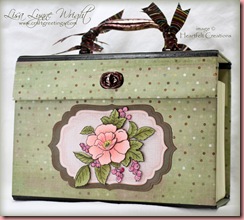
LisaLynneWright_HFCDesignSubmission_Project3_AlteredOutside LisaLynneWright_HFCDesignSubmission_Project3_AlteredInside

RedSignature

Wednesday, March 2, 2011

Thinking of You in Pink and Green

Celebrate!
Before we get to the card, I have to share a little celebration! Over the past couple of weeks, I’ve been working on 3 projects for a design team contest to one of my favorite companies – Heartfelt Creations.  Today I found out I made the semi-finalist list! I’m SO exited!! They have beautiful stamps and coordinating dies and I’m so honored to be part of the next step in choosing a design team.

My next 3 blog posts will be the projects I created for the first submission, while I’m busy working on the 2 projects for consideration to be a design team member.  Wish me luck!

Inspiration

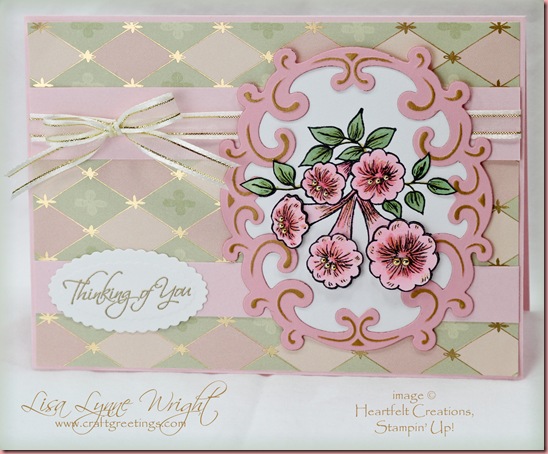
I was thinking about Mother’s Day when I made this card – every mom loves flowers, right? And spring begs for soft, pastel colors.  I found some patterned paper that is soft in color, with a touch of gold – a really nice base for the card.  Then I chose a flower stamp that I had not used yet, and built this card.

LisaLynneWright_HFCDesignSubmission_Project2_ThinkingOfYou

Ingredients

Paper

Note: finished card size is 5” x 7”

Pink Pirouette (SU!)

7” x 10”, scored at 5”, and
1 1/4” x 6 7/8” – 2 pieces

Pink diamonds patterned paper (K & Company)

4 7/8” x 6 7/8”

Stamper’s Select White (Paper Trey Ink)

5 1/2” x 8 1/2”

Pretty in Pink (SU!)

4 1/4” x 5 1/2”


Ink

Memento Tuxedo Black (Tsukineko)

Versamark (Tsukineko)


Stamps

Angel Trumpet Flowers (Heartfelt Creations)

Kind and Caring Thoughts (SU!)


Accessories

COPIC markers (Imagination International)


Decorative Oval Window Die (Heartfelt Creations)

Petite Scalloped Oval Die (Spellbinders)

Grand Calibur die cut machine (Spellbinders)

Old Gold Inka-Gold paint (Viva Décor)

Gold embossing powder (Stampendous)

Sponge

Heat gun

Gold Pearl Stickers (Recollections)

Bow Easy

Foam tape

Ribbon (Hobby Lobby)

Glue dots

Scor-Pal

Adhesive Transfer Gun 714 (Scotch)

Rotary trimmer with straight blade (Fiskars)

Shimmers spray (Tsukineko)

Instructions

Frame

Cut a window frame using the window die, and die cutting machine. Run it through twice – once to cut, and once to emboss. Before removing the die cut, use sponge to apply gold paint to the embossed design. Let the paint dry, then remove the die cut from the die.

Images

Stamp the trumpet flowers on the white card stock twice. Be sure to stamp one with enough space around it to fill in the window frame. Color with COPIC markers. I used these colors: G21, G40, RV10, RV11, RV13. Using the shimmer spray, spritz the images and let them dry.

Cut out one image in an oval – it doesn’t have to be neat – the window frame will go over it.

From the other image, cut out the four leaves that will overlap the frame, and the front of the three lower flowers. Add gold pearl stickers as the stamens of the flower fronts.

Mount the window frame die cut on the full flower image. Then add the flower fronts and leaves using foam tape.

On the remaining white cardstock, stamp the sentiment in embossing ink, and emboss with gold powder and the heat fun. Cut out the sentiment using the scalloped oval die – again run it through the die cut machine twice.

Assembly

Cut and score the base light pink card. Cut the patterned paper and adhere the panel to the front of the card.

Cut a ribbon and mount it along the middle of one of the narrow pink strips. Mount this narrow panel across the patterned paper about a 1/3 of the way from the top. Mount the second pink strip about 1/3 of the way from the bottom. Add the sentiment at the left end of the lower pink strip.

Mount the trumpets image on the left card.

Tie a bow using the Bow-Easy, and mount with a glue dot on the left of the image.

Thanks for stopping by!

RedSignature

LinkWithin

Blog Widget by LinkWithin