Wednesday, December 29, 2010

Swingin’ Z

Inspiration

This card is my last post for 2010!  My next post will be January 2, 2011 – I simply cannot believe how quickly the year flew by, and especially how fast my nice “relaxing” week off is going.

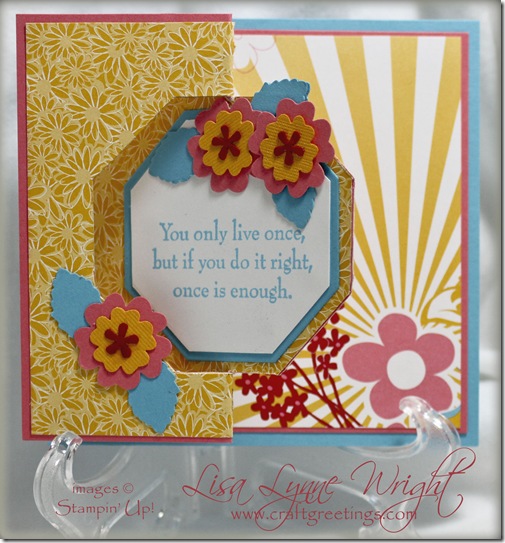
I created this one for a 21-year-old, who is saving money for a first trip to Hawaii.  We gave her some funding as a gift, and I made this card to inspire her with thoughts of Hawaii.

The design is called a Swinging Z-Fold, and it was the featured technique in last week’s “Inkling” newsletter from Splitcoast Stampers.  If you make cards, you’d love this weekly email with lots of ideas and great tutorials.  You can subscribe here.  They have a great tutorial for this technique (including a video) – click here to check it out.

On this card, the outside and inside are both decorated.  Here’s the outside:

20101229_Hawaii_SwingingZFold_01

And here’s what it look like when opened:

20101229_Hawaii_SwingingZFold_02Ingredients

Paper

Note: finished card size is 4 1/2” x 4 1/2”

Cameo Coral (SU!)

a) 4 1/4” x 8 1/2”
b) additional small scraps

Tempting Turquoise (SU!)

a) 4 1/2” x 4 1/2”
b) 3” x 3”
c) 2” x 4”
d) additional small scraps

Summer Sun Textured (SU!)

small scraps

Real Red (SU!) small scraps
Pink Flamingo DSP (SU!) 4 1/8” x 4 1/8” – 3 pieces
Whisper White (SU!) a) 1 7/8” x 3 7/8”
b) 3” x 3”
c) small scraps

Ink

Tempting Turquoise (SU!)

Stamps

Fifth Avenue Floral (SU!); Teeny Tiny Wishes (SU!); Motivational Centers (Cornish Heritage Farms)

Accessories

Punches: Small and Medium Oval (SU!), Flower and leaf punches (Make An Impression); Octagon Nestabilities (Spellbinders); Cuttlebug (Provo Craft); Scor-Pal; Adhesive Transfer Gun 714 (Scotch); Glue dots; Craft Knife; Rotary trimmer with straight blade (Fiskars); Scissors

Instructions

Making the Base Card

Starting with the coral paper, score it at 2 1/8”, and 4 1/4”. 

Mount a pieces of the patterned paper onto the un-scored side of the base.  I cut the paper specifically to highlight the sunburst pattern from the paper.

Apply adhesive on the scored side of the cardstock base facing the patterned paper, with additional adhesive on the outside half.  Mount another piece of patterned paper there.  Score the same panel again at 2 1/8" to make it easier to fold later.

Turn the card over, and apply adhesive to the other side of the scored panel, with additional adhesive on the outside half. Mount your last piece of patterned paper, and score once more at 2 1/8”.

Fold the scored side, then place the die template in the center, and trace only the LEFT side of the template, starting at the fold line at the top, and around the left to the fold line at the bottom.

Now, using the craft knife, cut along your traced lines.

Mount the un-scored square panel of the base card onto the large turquoise square.  For this card, I used the back of the turquoise square to write our greeting to the birthday girl.

Now you’re ready to decorate.

Decorating the Card

For the cut out decoration on the outside, use the largest octagon die to cut and emboss a turquoise shape.  Use the next size die to cut a white octagon, and stamp the sentiment in turquoise.  Mount the blue octagon to the card, and then the white octagon onto the blue.

Stamp Happy Birthday in turquoise on a scrap of white paper, and punch out with the smallest oval.  Punch a larger oval in turquoise.  Mount the birthday sentiment on the blue oval.  Adhere it to the inside of the card on the un-scored panel.

Use your remaining scraps to punch out leaves from blue, the largest flowers from coral, the medium flowers from yellow, and the flower centers from red. Mount these using glue dots around the sentiments.

Final Notes

I want to wish each and every one of you a very Happy New Year and many blessings in the coming months! If you are celebrating away from home, please stay safe on New Year’s Eve, and travel home safely.

Thanks for stopping by.

BlueSignature

Sunday, December 26, 2010

Snowmen Melt Your Heart

Inspiration

I hope everyone had a wonderful Christmas celebration with family and friends. Joe and I had a quiet day, which was a real blessing.  We cooked our favorite breakfast (waffles), and dinner (traditional turkey & dressing dinner), and watched “It’s A Wonderful Life” – which IT IS!

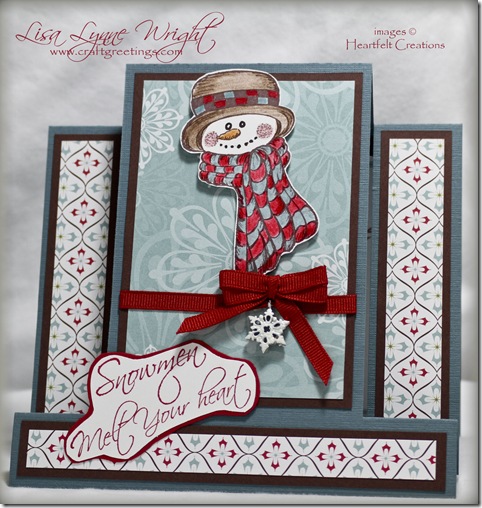
The last Christmas card I'll share this season is the one I made for Joe.  It's based on the "funky fold" design I found by "Sweet Designs by Cheryl".  She has an instructional video on the design here (Cheryl's blog) that really helped me out.  I’ve put in my instructions below, but if you like a more visual instruction, check out her video.

20101226_Snowmen

Ingredients

Paper

Note: finished card size is 6” x 6”

Baja Breeze textured (SU!)

6” x 12”

Chocolate Chip (SU!)

a) 3 1/4” x 4 3/4” – 1 piece
b) 1” x 4 3/4” – 2 pieces
c) 3/4” x 5 3/4” – 1 piece

Ski Slope DSP (SU!)

a) 3” x 4 1/2” – 1 piece
b) 3/4” x 4 1/2” – 2 pieces
c) 1/2” x 5 1/2” – 1 piece

Real Red (SU!) small scrap
Whisper White (SU!) 4 1/4” x 5 1/2”

Ink

Real Red (SU!); Chocolate Chip (SU!)

Stamps

Snowmen Melt Your Heart (Heartfelt Creations)

Accessories

Colored pencils (Prismacolor); Baja Breeze and Real Red markers (SU!); Red Grosgrain ribbon (Ribbon Warehouse); Bow-Easy; Snowflake charm (Hobby Lobby); Scor-Pal; Adhesive Transfer Gun 714 (Scotch); Foam tape; Glue dots; Rotary trimmer with straight blade (Fiskars); Scissors

Instructions

Image

Stamp the snowman in brown on the white panel, color with pencils and markers, and trim closely.  Stamp the sentiment in red on the remaining white paper, and  trim it closely.  Adhere it to the red scrap, and trim it again.

Assembly

HINT: Once the base card is done, the rest is very simple - just lots of glue!

Step 1

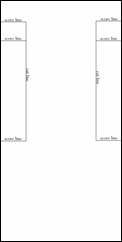
Measure 1” from one end of the card, and 1 1/4” in from the side.  Cut from that point down the length of the card for 6” (this makes the cut from 1” to 7”).

Repeat on the other side of the card.

FunkyFoldPattern_01

Step 2

Score from the outside of the card to the cut line at the 1” end of the line.

Repeat on the other side of the card.

FunkyFoldPattern_02

Step 3

Score from the outside of the card to the cut line 1” from the first score (2” from end of card).

Repeat on the other side of the card.

FunkyFoldPattern_03

Step 4

Score from the outside of the card to the cut line at the other end of the cut.

Repeat on the other side of the card.

FunkyFoldPattern_04

Step 5

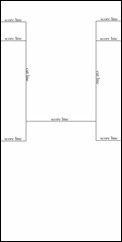
Score between the cut lines at 6” from the end of the card.

FunkyFoldPattern

All of the score lines are “mountain folds”, except the ones at the 2” point – this one is a “valley fold”.

Mount the patterned paper on the brown mat pieces.  String the charm onto a piece of red ribbon, and mount it around the largest piece.

Mount each patterned stack onto the card in the appropriate locations.

Now add a red bow above the charm using glue dots, and mount the image using foam tape.  Add the sentiment in the lower left area.

Final Notes

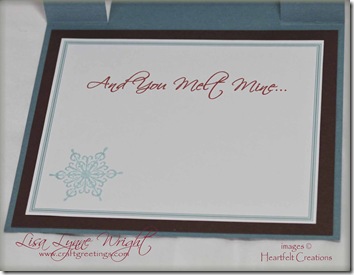
Inside20101226_Snowmen_Inside

For inside, I needed a “mushy” sentiment to make my hubby smile!  I happened to have a font on my computer that closely matches the font of the “Snowmen” sentiment.  The font is called Scriptina.

Using Word, I created a text box sized 4” x 5”, and typed the sentiment in red, and formatted the text box with a triple border in blue.  Now, since I’m a nerd, I had to make the red and blue MATCH Real Red and Baja Breeze!  A set of RGB codes for SU! colors (and many others are available on Splitcoast here.  If you’re not into that much detail, just pick what looks best to you.

I printed it out on white card stock, and cut it out, sizing it to 4 1/4” x 5 1/4”. I stamped the snowflake in Baja Breeze in the corner.  This snowflake is from the Heartfelt Creations set called “Snowflake Medley”.

I cut a solid brown panel (4 3/4” x 5 3/4”) and mounted it inside, and added the printed/stamped greeting on top of the brown mat.

Again, I hope you have all had a Merry Christmas.  Thanks for stopping by.
BlueSignature

Thursday, December 23, 2010

Holiday Thanks

Inspiration

Good morning!  I’m late posting my mid-week card – yesterday was my last day at work for 2010(yea!!!) and I had lots to do to make sure I don’t have to worry much about work for the next 10 days.  So I’m starting my holiday week with my blog post.

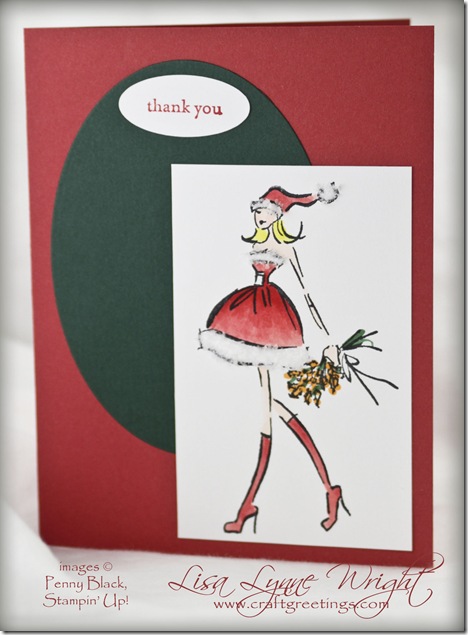
Unfortunately, I’ve been late on all sorts of things this season – I only sent my birthday thank you cards this week with my late Christmas cards.  So my birthday thank you’s have a Christmas-y feel:

Blog_20101223_HolidayThanks

Ingredients

Paper

Note: finished card size is 4 1/4” x 5 1/2”

Ruby Red (SU!)

5 1/2” x 8.25”, score at 4 1/4”

Hunter Green (SU!)

3 1/2” x 4 1/2”

Stampers Select White (Paper Trey)

a) 2 1/2” x 4”
b) small scrap

Ink

Ruby Red (SU!), Tuxedo Black (Memento)

Stamps

Mademoiselle Noel (Penny Black); Teeny Tiny Wishes (SU!) 

Accessories

COPIC Markers (Imagination International); Plain Oval Nestabilities die (Spellbinders); Cuttlebug (Provo Craft); Oval punch (SU!); Polar White Flower Soft (flower-soft.com); Flower Soft glue (flower-soft.com); Scor-Pal; Adhesive Transfer Gun 714 (Scotch); Rotary trimmer with straight blade (Fiskars); Scissors

Instructions

Images

Stamp the sentiment on a small scrap of white paper in red, and punch it out using the oval punch.

Stamp the image on the white panel in black, and color with COPICs.  Here’s the colors I used:

  • Hat/Dress/Boots: R21, R24, R27
  • Skin: E000, E00
  • Hair: Y02, Y08
  • Flowers: YR15, G28

Spread glue on the trim areas of the skirt and hat, and sprinkle on the Flower Soft, and press to set.  Let dry.

Assembly

Run the green panel through the die cutter with the Oval Nestabilities die.

Mount the green oval positioned to the upper left on the front panel of the base red card. Add the sentiment at the top of the oval.

Mount the image panel positioned in the lower left of the card.

Final Notes

Grateful

I want to express my thanks to all who have left comments on my work over the past few months – I really enjoy hearing from you all.  Blogging is a funny thing – you spend time writing and send your creation out in the web, and hope someone will respond.  It is so nice when you get a comment on your efforts.

I wish you all a very Merry Christmas!

Thanks for stopping by.
BlueSignature

Sunday, December 19, 2010

Sympathy Sentiment

Inspiration

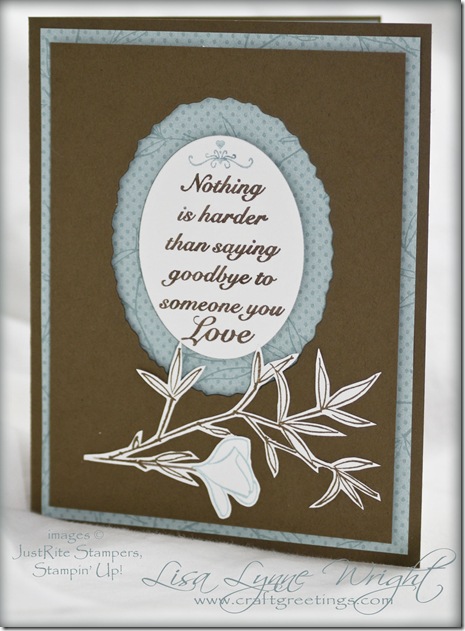
Even in the middle of such a joyous season, we often encounter sad events, too.  I found myself with the somber need for three sympathy cards all at the same time – one for a friend, one for a coworker, and one for Faith H (Markie’s Mom).  Faith makes beautiful cards, and I read her blog every day.  Inspiration was hard to come by, so I surfed Splitcoast and found a beautiful card by Deb Felts (click here).   Here’s my version.

Blog_20101219_SympathySentiment

Ingredients

Paper

Note: finished card size is 4 1/4” x 5 1/2”

Soft Suede (SU!)

a) 4 1/4” x 11”, score at 5 1/2”
b) 3 3/4” x 5”

Green Tea DSP (SU!)

4” x 5 1/4”

Whisper White (SU!)

4” x 5 1/4”

Ink

Soft Suede (SU!)

Stamps

Thinking of You (JustRite Stampers); Embrace Life (SU!) 

Accessories

Soft Suede and Baja Breeze Markers (SU!); Stamp-a-ma-Jig; Deckled Oval and Plain Oval Nestabilities (Spellbinders); Cuttlebug (Provo Craft); Scor-Pal; Adhesive Transfer Gun 714 (Scotch); Foam tape; Rotary trimmer with straight blade (Fiskars); Scissors; Xacto Knife 

Instructions

Sentiment

Using the markers, color the words of the sentiment in brown, and the flower in blue.  Stamp the sentiment on the white cardstock.

Align the plain oval die over the sentiment, and cut it out using the die cut machine.

Image

Use the stamp positioner to create the combined image of the leaves and flower.

First, color the flower using the blue marker, and part of the stem using brown, and stamp it on the white cardstock. StampPosition1
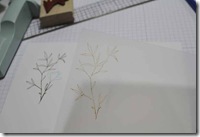
Then, stamp the leaves in brown on the clear positioner sheet. StampPosition2
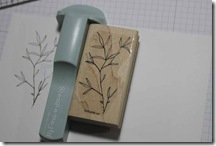
Using the clear sheet, align the leaves over the flower, so it looks like the flower is growing from the main stem.  Put the stamp positioner in place. StampPosition3
Now, remove the clear sheet, and stamp the leaves in brown holding the positioner in exactly the spot. StampPosition4
Now you have your complete image – ready to cut out.

Trim is closely, and use the knife to cut the enclosed inner areas.
StampPosition5

Assembly

Run the smaller brown panel through the die cutter with the deckled oval die, to create the window panel.

Mount the patterned on the front panel of the base brown card. Then mount the designer paper using foam tape.  The window panel is mounted with foam tape.  Then add the sentiment oval in the center of the window using foam tape.

Glue the flower image across the bottom of the card using a clear-drying glue.

Thanks for stopping by.
BlueSignature

Sunday, December 12, 2010

Cupcake Crazy

Inspiration

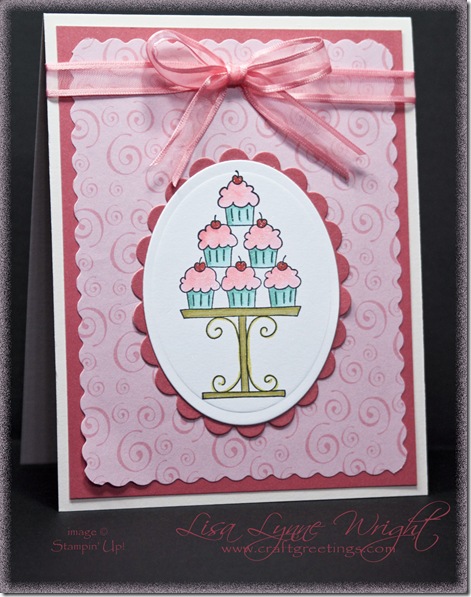
A late November birthday gets lost in Thanksgiving celebrations and a December birthday gets lost in Christmas, so I like to make sure the birthday cards I send look nothing like a holiday.  Here’s a card that’s easy to make in a hurry, but still looks like it is especially for a birthday.

Blog_20101212_CupcakeCrazy

Ingredients

Paper

Note: finished card size is 4 1/4” x 5 1/2”

Whisper White (SU!)

4 1/4” x 11”, score at 5 1/2”

Stamper’s Select White (Paper Trey)

3” x 4”

Rose Red (SU!)

a)  4 x 5 1/4”
b) 3” x 4”

Patterned paper (unknown)

3 3/4” x 5”

Ink

Tuxedo Black (Memento)

Stamps

Cupcake Crazy (SU!) 

Accessories

COPIC Markers: BG000, BG11, BG13, RV10, RV21, E31 (Imagination International); SPICA Glitter Pens: red, blossom, turquoise, gold (Imagination International); Pink ribbon (Hobby Lobby); Scalloped Oval Nestabilities, Plain Oval Nestabilities (Spellbinders); Cuttlebug (Provo Craft); Scor-Pal; Adhesive Transfer Gun 714 (Scotch); Rotary trimmer with straight and scalloped blades (Fiskars); Scissors

Instructions

Image

Using the black ink, stamp the cupcake image on the Paper Trey white cardstock piece, and cut it out with the plain oval die.  Run it through twice – once to cut and once to emboss.

Color with COPICs, and enhance the image with the SPICA glitter pens.

Assembly

Cut a scalloped oval out of the smaller pink card stock.  Use a scalloped edge blade to cut the patterned paper panel.

Mount in this order:

  • pink cardstock
  • patterned paper
  • pink oval
  • image oval

Tie the ribbon around the card in a bow above the mounted image.

Thanks for stopping by!

BlueSignature

Tuesday, December 7, 2010

Precious Gifts

Inspiration

I’m celebrating a friend’s birthday this week early, along with a late celebration for my birthday – we have the last 2 birthdays of the year in our circle of “diva'” friends - she is the youngest of my circle of girl friends and I’m the oldest!  This card celebrates our friendship.

I started with the Splitcoast “Fan Club” monthly sketch challenge, and picked stamps and Nestabilities I haven’t used much, and this is the result:

Blog_20101208_PreciousGifts

Ingredients

Paper

Note: finished card size is 5” x 7”

Bravo Burgundy (SU!)

a) 7” x 10”, score at 5”
b) small scrap, about 5/8” x 2 5/8”

So Saffron (SU!)

4” x 4”

Parisian Summer DSP (SU!)

4 1/4” x 7”

Very Vanilla (SU!) a) 3” x 3”
b) small scrap about 1/2” x 2 1/2”

Ink

Bravo Burgundy (SU!)

Stamps

Friendship Set (JustRite Stampers); Birthday Centers (Cornish Heritage Farms)

Accessories

Markers: Pink Pirouette, So Saffron, Bravo Burgundy, Mellow Moss (SU!); SPICA Glitter pens: Garnet, Yellow, Pink (Imagination International); Nestabilities: Labels Ten, Eyelet Circles, and Plain Circles (Spellbinders); Cuttlebug (Provo Craft); Bow-Easy; Grosgrain Ribbon (SU!); Scor-Pal; Adhesive Transfer Gun 714 (Scotch); Foam tape; Glue dots; Rotary trimmer with straight blade (Fiskars); Scissors

Instructions

Image

Cheers Sentiment:  Stamp the saying in burgundy on the small scrap of vanilla paper, and mount it on the small burgundy strip.

Precious Gifts Sentiment: Stamp the image in burgundy on the larger piece of vanilla paper, then cut it out using the plain circle Nestabilities die.  Color the image with the dye markers, and accent with the glitter pens.

Friendship Sentiment: Stamp the image in burgundy on the yellow cardstock, then cut it out with the largest Eyelet Circle die.  Run it through the die cutter twice – once to cut, and once to emboss.

Assembly

Run the patterned paper through the die cutter using the largest Labels Ten die.  Mount it slightly toward the top of the front of the base card.

Mount the yellow die cut using foam tape over the bottom portion of the label die cut.  Add the image on the vanilla circle to the center using foam tape.

Mount the cheers sentiment above the yellow, then tie your bow with the yellow ribbon, and mount it near the top of the label using glue dots.  All done!

Final Notes

Inside

I cut another patterned paper large Label Ten, then the next smaller size Label Ten die out of vanilla.  I stamped a sentiment in burgundy on the vanilla and layered then in the center of the inside panel.

Just a Note

I’m posting this a little early because my schedule is changing a bit – I’ve enrolled in a “Web Master Certification” course, and my classes are Monday-Wednesday-Friday, so I’m posting this on Tuesday.  I’ll still post twice a week, and try to keep it to Sunday/Wednesday, but there may be some variations depending on homework, etc.  Hopefully, you’ll eventually see a brand new blog and website as I learn more about Web design and coding!!!

Thanks for stopping by.

BlueSignature

Sunday, December 5, 2010

You Rock!

Inspiration

I was lucky enough to attend a workshop by Michelle Zindorf early this year – it was SO much fun!  Michelle does amazing work with white paper, a brayer, and beautiful combinations of dye inks – AND she writes fabulous tutorials on her blog – check out Freedom in Creating. (When I went to look for the correct link, I noticed she has 377 tutorials posted – WOW!!!!)

Here’s one I received rave reviews from the young folks who received it as a birthday greeting this year.  It’s a case of the “Sunset Skateboarder” tutorial.

Blog_20101205_YouRock

Ingredients

Paper

Note: finished card size is 5” x 7”

Bordering Blue (SU!)

7” x 10”, score at 5”

Brilliant Blue (SU!)

2.5” x 6 1/2”

Only Orange (SU!)

2.5” x 6”

Summer Sun *SU!) 2” x 5.5”
Whisper White (SU!) 3” x 5”

Ink

Bordering Blue (SU!); Brilliant Blue (SU!), Only Orange (SU!), Summer Sun (SU!), Basic Black (SU!)

Stamps

You Rock (Inkadinkado); Musical Score (Art Impressions); Extreme Guitar (SU!); Sanded Background (SU!) 

Accessories

Rubber Brayer (3M); Post-It Notes; 1 3/8” circle punch (SU!); sponge; Scor-Pal; Adhesive Transfer Gun 714 (Scotch); Foam tape; Rotary trimmer with straight blade (Fiskars); Scissors

Instructions

Background Panels

Stamp the background pattern using blue ink on the bright blue panel, and the orange panel.  Stamp the background pattern using orange ink on the yellow panel.

Sentiment

Stamp the sentiment in black in the upper right corner of the base card.

Image

Punch a circle from a Post-It note to use as a mask.

Using the brayer, apply yellow ink lightly to the lower part of the white panel.  After a couple of coats, attach the circle mask, then apply some more yellow with the brayer.  Follow up by applying orange with the brayer – not quite all the way – this achieves the color gradient.

Now start at the other end of the card. Brayer the lighter blue ink just until it touches the top of the brayered orange ink, then add the darker blue ink to create the gradient effect.

Before removing the circle mask, stamp the music image in black 3 times.

Then remove the mask, and stamp the guitarist image in black near the ending point of the music lines.

Finish up the image panel by sponging black ink around the edges.

Assembly

Assembly is easy – simply mount the panels in order on the front of the card.

Thanks for stopping by.
BlueSignature

Wednesday, December 1, 2010

Quiet Winter Greetings

Inspiration

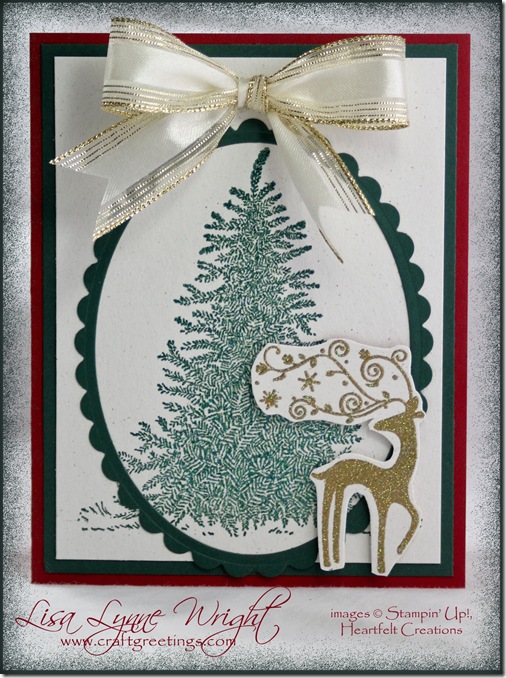
This card came about by having stamps I’ve never used that I wanted to experiment with plus I needed a third Christmas greeting card that I could make quickly with limited detail! While this one still has cutting detail, it has NO coloring by hand – all the color comes from embossing powders!

Blog_20101201_QuietGreetings

Ingredients

Paper

Note: finished card size is 4 1/4” x 5 1/2”

Cherry Cobbler (SU!)

a) 4 1/4” x 11, score at 5 1/2”

Handsome Hunter (SU!)

4 1/8” x 5 3/8”

Naturals White (SU!)

a) 4” x 5 1/4”
b) scrap about 2” x 2”

Ink

Versamark (Tsukineko)

Stamps

Blue Spruce (Heartfelt Creations); Dasher (SU!)

Accessories

Green sparkle and Gold sparkle embossing powders (Creations Unlimited); Heat Gun; Scalloped and Plain Oval Nestabilites dies (Spellbinders); Magnetic spacer plate(Spellbinders); Cuttlebug (Provo Craft); Gold trimmed ribbon (Michaels); Bow-Easy; Scor-Pal; Adhesive Transfer Gun 714 (Scotch); Foam tape; Glue dots; Rotary trimmer with straight blade (Fiskars); Scissors

Instructions

Image

Using the embossing ink pad, stamp the tree on the large white cardstock panel, and emboss with the green embossing powder. Then stamp the deer on the smaller white cardstock piece, and emboss in gold. Trim the deer closely.

Assembly

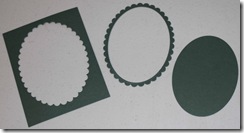
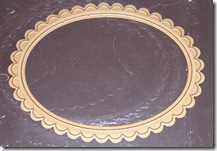
HINT: This card looks like it takes more green paper than I actually used - Since piecesthe tree image panel completely covers the green panel, I simply cut the scalloped oval from the center of the green panel. This gave me the mat layer for the image, the scalloped frame for the image, and a “spare” plain oval I can use for something else.

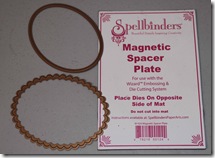
The magnetic spacer plate assists in this effort: The plain oval die fits exactly into the scalloped die and the magnetic pad holds it all in place.

mag_plate2 mag_plate

Run the green panel through the die cutter with the magnetic pad and the nested dies.

Mount the green paper on the front panels of the base red card. Then mount the tree image on the green mat layer. Add the oval frame over the tree.

Mount the deer on foam tape on the lower right of the card front using foam tape.

Tie a bow using the Bow-Easy, and mount it above the frame using one or two glue dots.

Final Notes

Inside / Envelope

I cut a solid green panel (4” x 5 1/4”), stamped my sentiment on a smaller white panel (3 3/4” x 5”) and layered them on the inside.

Thanks for stopping by.

BlueSignature

LinkWithin

Blog Widget by LinkWithin