Showing posts with label Mother's Day. Show all posts

Sunday, May 13, 2012

Happy Mother's Day

Inspiration

Happy Mother's Day! I hope all the mothers out there are being pampered and spoiled as they so richly deserve! My husband is at home in Tennessee this morning taking care of his mom, like the very good son that he is. Happy Mother's Day, Caroline! And Happy Mother's Day to my Mom, too! I showed you the card for my mother yesterday - Today's card is the one I made for my mother-in-law.

MothersDay2

Ingredients

Note: finished card size is 5" x 7"

Stamps

Poppies (A Stamp In the Hand)
Happy Mother's Day (Stampendous)

Paper

Perfect Plum (SU!)7" x 10", scored at 5"
Old Olive (SU!)4 3/4" x 6 3/4"
Cottage Wall DSP (SU!)4 1/2" x 5"
Elegant Eggplant (SU!)4 1/4" x 4 1/4"
90lb Watercolor Paper (Canson)4 1/4" x 4 1/4"

Ink

Distress Inks (Ranger): Milled Lavender, Dusty Concord, Old Paper, Crushed Olive
Elegant Eggplant (SU!)

Accessories

Fleur De Lis Square Nestabilities (Spellbinders)
Grand Calibur (Spellbinders)
Ink Blending Tool (Ranger)
Mister (Ranger)
Corner Rounder Punch (SU!)
White Ribbon (Hobby Lobby)
Becca's Peg Bow Maker (ODBD)
3-D Foam Squares (Scrapbook Adhesives)
ATG (3M)
Scor-Pal
Rotary Trimmer (Fiskars)

Instructions

BASE CARD and MAT

Start with a piece of light purple card stock measuring 7" x 10", score at 5" and fold.

Cut a mat of dark green card stock 4 3/4" x 6 3/4", and round the corners with a punch. Cut a piece of patterned paper measuring 4 1/2" x 5", round the top two corners with a punch and mount onto the green mat. Stamp the sentiment in dark green ink in the lower right corner of the green mat.

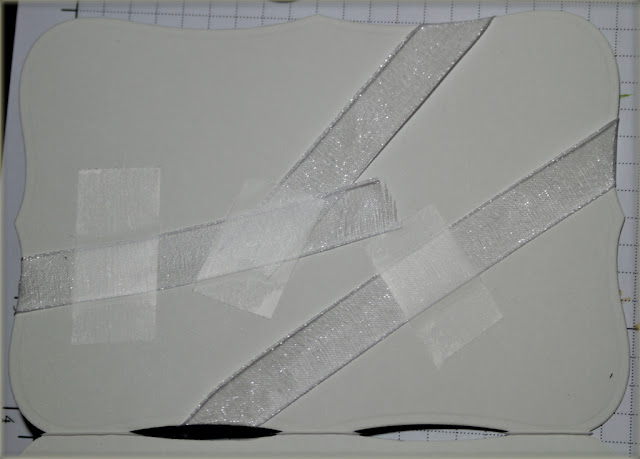
Tie a double bow of white ribbon, with a ribbon strip through the bow, and mount onto the mat across the seam between the patterned paper and the sentiment, with the bow on the far left side of the mat.

Mount the mat with the bow onto the front of the card.

IMAGE

This card uses the "Brushless Watercolor" technique that I learned in the Creative Chemistry 101 course a few weeks ago. Start by tapping the Distress ink pads directly on the stamp. I used mostly the light purple and green pads, then touched the edges of the blossoms with the darker purple shade. Now, mist the stamp with water and stamp it onto the watercolor paper.

Cut/emboss the image using the largest Fleur De Lis square die, and remove it from the die. Use the ink blending tool to add purple shading to the embossed edges of the die cut.

Cut a dark purple mat measuring 4 1/4" x 4 1/4", and round all 4 corners of the mat. Mount this onto the card front above the ribbon, using foam squares. Finally, mount the image onto the mat using foam squares.

Another Version

It's a very versatile design - here's another one I made to use for a special birthday - Same ink and method, but slightly different paper.

MothersDay2Birthday

Thanks for stopping by, and again, Happy Mother's Day!

Orange_Green

Saturday, May 12, 2012

Early Mother's Day

Inspiration

I'm very fortunate to be in my 50's with both my mother and my husband's mother alive and healthy. So I make 2 special cards every May to send off to East Tennessee, where they both live. Today's card is the one I made for my own mother - she loves gardens and butterflies, especially in the spring.

MothersDay1

Ingredients

Note: finished card size is 5" x 7"

Stamps

Fabulous Flourishes (Tim Holtz Collection by Stampers Anonymous)
Floral Wreath (Gina K Designs)
Butterfly and Lilies (Heartfelt Creations)
Mother's Day Centers (Cornish Heritage Farms)

Paper

Pink Pirouette7" x 10"; scored at 5", and
4 1/4" x 5 1/2"
X-Press It Blending Card (Imagination International)3" x 5 1/2"

Ink

Distress Embossing Ink (Ranger)
Distress Inks and Re-Inkers (Ranger): Spun Sugar, Worn Lipstick, and Weathered Wood

Accessories

Butterflight On the Edge Die (Tim Holtz Alterations by Sizzix)
Big Shot Pro (Sizzix)
Fine Detail White Embossing Powder (Sweet Stamps)
Heat Gun
Ink Blending Tool (Ranger)
Tim Holtz Detail Water Brush (Ranger)
Stamp-A-Ma-Jig (EK Success)
Zip Dry Glue
3-D Foam Squares (Scrapbook Adhesives)
Scor-Pal
Cutter Bee Scissors (EK Success)
Rotary Trimmer (Fiskars)

Instructions

BASE CARD

Start with a piece of pink card stock measuring 7" x 10", score at 5" and fold. Stamp the flourish diagonally across the card front using embossing ink, and heat emboss with fine detail white embossing powder.

Use the ink blending tool to shade all 4 edges of the card. If you get ink on the white flourish, simply wipe it off with a paper towel.

BORDER

Use the Butterflight die to cut a border of butterflies using white card stock. Using the ink blending tool, apply Distress inks to color the butterflies. Glue the border to the bottom edge of the card front.

IMAGES

Stamp the butterfly and wreath images on pink card stock using embossing ink, and heat emboss with detail white embossing powder. Carefully cut out both images. Color the images using a brush, and Distress Re-Inkers. Use dark pink ink to stamp the sentiment in the center of the wreath. I use my Stamp-A-Ma-Jig to position the sentiment just where I want it.

Finish by mounting the wreath in the open curve of the flourish and the butterfly in the right upper corner of the card, using foam squares.

Thanks for stopping by!

Orange_Green

Sunday, March 25, 2012

Reruns

Inspiration

It's a "rerun" Sunday for me - I'm showing you 2 cards today - both are repeats of cards I've shown in the past, just with different papers and messages. I'll give you the link to the past blogpost for the instructions, but all the new ingredients are listed.

Wonderful Mother

This card is a copy of the card I posted last fall, called Artistic Gatefold Birthday. Check there for the instructions. I made this one for my mother-in-law, an amazing woman who is now a caregiver to my father-in-law, who suffers from alzheimers. My sweet husband wanted to send his mom a very special card to tell her how much he admires and loves her!

WonderfulMother

WonderfulMother

Ingredients

Note: Finished card size: 4 1/2" x 7"

Paper

Perfect Plum (SU!)7" x 9"; scored at 2 1/4" and 7 1/4", and
1 1/2" x 2"
Pale Plum (SU!)4 1/2" x 7", and
2 1/4" x 7" (2 pieces)
Patterned paper (GCD Studios - Donna Salazar Antiquities)2 1/4" x 7" (2 pieces), and
small scraps for flowers

Ink

Perfect Plum (SU!)

Stamps

HCPC 3389 Sentiments for Mom (Heartfelt Creations)
HCPC 3453: Malabar Clematis PreCut Set (Heartfelt Creations)

Accessories

HCD 716: Layered Elegant Swirl Die (Heartfelt Creations)
Petite Ovals - Large Nestabilities (Spellbinders)
Petite Ovals - Small Nestabilities (Spellbinders)
Grand Calibur (Spellbinders)
Liquid Pearls - Lavender Lace (Ranger)
Designer Dries Clear Glue (Art Glitter Glue)
Zip-Dry Glue
ATG (3M)
Rotary Trimmer (Fiskars)

Making History 2

This is a more recent posted card from only a few weeks ago, called Making History. Check there for the instructions. I made this one for one of my best friends, the "Queen Diva".

MakingHistory2

Ingredients

Note: Finished card size: 5" x 7"

Stamps

Belle (Rubbernecker Stamps)
Favorite Thoughts (SU!)

Paper

Blushing Bride (SU!)7" x 10", scored at 5"
Leaf (Paper Trey Ink)3 1/2" x 6 7/8"
Pixie (Memory Box)4 1/2" x 5 1/2"
Autumn Rose (Paper Trey Ink)3 1/2" x 6 7/8"
Stamper's Select White (Paper Trey Ink)4 1/2" x 5 1/2", and
2 1/2" x 3 1/2"

Ink

Memento Tuxedo Black (Tsukineko)

Accessories

Grand Ovals (Spellbinders)
Grand Big Scalloped Ovals (Spellbinders)
Classic Scallop Edgeabilities (Spellbinders)
Classic Postage Stamps Edgeabilities (Spellbinders)
Ribbon Banners (Spellbinders)
Grand Calibur (Spellbinders)
Ribbon (Paper Trey Ink)
Peg Bow Maker (Unity Stamps)
COPIC Markers - E00, E02, Y12 (Imagination International)
Diamond Destress Stickles (Ranger)
Zip Dry
Double sided tape (PK Glitz)
ATG (3M)
Scor-Pal
Rotary Trimmer (Fiskars)

That's all folks!

Well, those are my reruns - hope you enjoyed them; I have such fun making new cards, I seldom repeat, but I thought these designs were pretty special and could use another visit.

Thanks for stopping by!

Orange_Green

Friday, March 9, 2012

Making History

Inspiration

I picked up this stylish lady image at one of the stamp shows in Dallas earlier this year. It really is fun! I immediately thought it would be perfect for a friend's birthday this week, and thought how versatile it would be if I used paper piecing - a new patterned paper equals a new dress!

After I made it, I found that the Corrosive Challenge Blog has a paper piecing challenge this week called "Give Piece a Chance" - how cute!

I'm entering this one in the Craft Your Passion challenge, too - it's an "anything goes" week.

MakingHistory

Ingredients

Note: Finished card size: 5" x 7"

Stamps

Belle (Rubbernecker Stamps)
Favorite Thoughts (SU!)

Paper

So Saffron (SU!)7" x 10", scored at 5"
Certainly Celery (SU!)3 1/2" x 6 7/8"
Cameo Coral (SU!)4 1/2" x 5 1/2"
Classic K Designer Paper (K & Co)4 1/2" x 5 1/2"
Lost & Found Designer Paper (My Mind's Eye)4 1/2" x 5 1/2"
Stamper's Select White (Paper Trey Ink)4 1/2" x 5 1/2", and
2 1/2" x 3 1/2"

Ink

Memento Rich Cocoa (Tsukineko)

Accessories

Grand Ovals (Spellbinders)
Grand Big Scalloped Ovals (Spellbinders)
Ribbon Banners (Spellbinders)
Grand Calibur (Spellbinders)
Ribbon (Hobby Lobby)
Peg Bow Maker (Unity Stamps)
COPIC Markers (Imagination International)
SPICA Glitter Pen (Imagination International)
Diamond Destress Stickles (Ranger)
Zip Dry
Double sided Sticky Tape (PK Glitz)
ATG (3M)
Scor-Pal
Rotary Trimmer (Fiskars)

Instructions

BASE CARD

Make the base card using a piece of yellow card stock cut to 7" x 10". Score it at 5", and fold.

MAT LAYER

Cut a piece of light green card stock to measure 3 1/2" x 6 7/8". Using double sided tape, mount a strip of ribbon vertically on the left side of this mat layer. Mount the mat on the left side of the card front. Tie a matching bow, and adhere to the ribbon strip.

IMAGE

Stamp the image 3 times: once on the dress fabric patterned paper, once on the pink designer paper, and once on a piece of white card stock measuring 4 1/2" x 5 1/2". Cut/emboss the image on white card stock using the Grand Ovals die that leaves a small border around the image. On the white image using COPIC markers, color the face, arms, legs using E000 and E02, and hair using Y21. Color the bracelets with a green SPICA glitter pen.

Cut the dress and hat band out carefully. Cut the hat, dress belt and collar, drape, and shoes from the pink paper image. Carefully glue the trimmed images onto the white image.

Cut/emboss a Grand Scalloped Oval from the pink card stock. Mount on the card fron to the right of the bow. Adhere the image oval onto the scalloped oval mat. Use Diamond Stickles to cover the embossed edge of the pink scalloped oval.

SENTIMENT

Cut/emboss a ribbon banner from white card stock. Stamp the sentiment in brown ink on the white ribbon die cut. Mount below the image on the card front. Use Diamond Stickles to cover the embossed edges of the ribbon banner.

Thanks for stopping by!

Orange_Green

Wednesday, May 18, 2011

Cheery Day for Mom

Inspiration

Today's blog post at Heartfelt Creations features more samples made with the new Bella Rose Collection - the design team has outdone themselves!

The solid stamps found in the Bold Bella Rose set offer lots of possibilities for beautiful creations. This card is a monochromatic treatment used on a tri-fold window card, using varying shades of peach.

Cheery Day One


Ingredients

Note: Finished card size is 4" x 6"

Paper

Taffy (CTMH) 6" x 12", scored at 4" and 8"
Dusty Durango (SU!) 5 1/2" x 8 1/2"
Whisper White (SU!) 4 1/4" x 5 1/2"

Inks

Groovy Guava (SU!)
Dusty Durango (SU!)

Stamps

HCPC 3391 Bold Bella Rose Precut Set
HCPC 3389 Sentiments for Mom Precut Set
HCPC 3386 Cheery Cardinal Precut Set

Accessories

Labels 9 Nestabilities (Spellbinders)
Petite Oval Small Nestabilities (Spellbinders)
Petite Scallop Oval Large Nestabilities (Spellbinders)
Fancy Tags Shapeabilities (Spellbinders)
Grand Calibur (Spellbinders)
Stamp-A-Ma-Jig
Post-It Note
Zip Dry
Scor-Pal
ATG 714
Scissors
Rotary Trimmer

Instructions

Prepping the PiecesWindow

Use light orange paper cut to 12" x 6", score it at 4" and 8". Cut a window in the front panel using the middle sized Label 9 die.

Using the dark orange paper, cut and emboss a large scalloped oval, a tag, and a Label 9 frame. You can create the frame by placing the middle die inside the next largest die and run the set through the machine. Hint - I use plain tape to hold the dies in place.

Die Cuts

Also, cut a plain white oval to fit inside the scalloped oval.

Outside of Card

Glue the dark orange frame around the window on the front of the card.

Stamp a border across the bottom of the card using the small solid rose stamp, rotating it slightly for each image. The border is stamped on the front panel, all three inside panels, and the back of the left panel.

Stamp the "Mom" sentiment under the window on the front of the card.

Through the Window

Stamp the large solid rose image in light orange on the white oval, and the top half of the "cheery" message in dark orange under the rose. I used my Stamp-A-Ma-Jig to get the saying right where I wanted it. Mount the white oval on the dark orange scalloped oval. Adhere the image on the back of the left-most panel so that the rose will show through the window when the card is closed.

Cheery Day Two

Inside of Card

Create a mask by stamping the large rose image on a Post-It, and trimming it closely. Stamp the large rose in dark orange ink inside the card in the middle panel. Mask it, and stamp the leaf spray, and individual rose buds over and around the masked image using light orange ink.

Stamp the bottom half of the "cheery" image in dark orange on white paper, and cut it out. Mount it on top of the tag die cut, and mount it on the left-most panel.

Cheery Day Three

Thanks for stopping by!

Blue_Orange

Saturday, May 7, 2011

Bluebird Family

Inspiration

The "other bird" in the Heartfelt Creations Springtime Cardinals release is the one on this card - a mother bird feeding her chicks.  You could color this one almost any color! When I am choosing colors, I often start with the paper on hand.  For this one, I started with a patterned paper I liked from the Linen Closet pack from DCWV. I found a solid blue cardstock that was a close match, then chose my COPIC colors to go with it.  Here is the result, which was featured on the HC Blog on 5/4/2011.

Bluebird_Family

Ingredients

Note: Finished Card Size: 4” x 5 1/2”

Paper

Linen Closet (DCWV) 5 1/2” x 8 1/2”, scored at 4 1/4”
Blue Bayou (SU!) 4 1/4” x 5 1/2”
Soft Sky (SU!) 5 1/2” x 8 1/2”
Stamper's Select White (PTI) 4 1/4” x 5 1/2”; plus a small scrap

Inks

Memento Tuxedo Black (Tsukineko)
Soft Sky (SU!)
Blue Bayou (SU!)

Stamps

HCPC 3385 Spring Birdies and Roses Precut Set (Heartfelt Creations)
HCPC 3384 Cardinal Posy Wreath Precut Set (Heartfelt Creations)

Accessories

Label 8 Nestabilities (Spellbinders)
Scalloped Oval Nestabilities (Spellbinders)
Plain Oval Nestabilities (Spellbinders)
Grand Calibur (Spellbinders)
COPIC Markers (Imagination International)
Bow-Easy
White gauze ribbon
Scalloped oval punch (SU!)
Scor-Pal
ATG 714 (Scotch)
Rotary Trimmer (Fiskars)

Instructions

Base Card

Use the patterned paper for the base card - score and fold.  Place the Label 8 Nestabilities die just below the fold, and cut out the card with the die cut machine.

Image

Stamp the bluebird family image on white. Color with COPIC markers. Here are the colors I used:

  • Birds: BG70, BG72, BG75, Y15
  • Worm/Baby Bird Mouths: YR02
  • Roses: R81, R83, R85
  • Leaves: G82, G85
  • Branch: E55, E57

Cut and emboss the image using a plain oval Nestabilities die. I thought the white cardstock was kind of stark, so I used a sponge and the light blue ink to shade the background of the oval, but I didn't want to sponge over the image, so I used the masking technique. To do this:

  • Stamp the image on a scrap of cardstock, and carefully cut it out, including the spaces between the leaves. Create the Mask 
  • Cover the image with the mask. Sponge the Color
  • Sponge light blue ink around the image.

    Tea Party Invite

Assembly

Cut and emboss a scalloped circle from the dark blue paper. Mount the image oval on the scalloped oval, and add it to the front of the card.Secure the Ribbon

Since the card has an opening at the top, wrap the ribbon around opposite corners of the card front and taped it in the back.


To cover the taped ribbon and create the inside greeting, cut and emboss two smaller Label 8 dies - mount one on each of the inside surfaces.

Tea Party Invite

Stamp the sentiment in dark blue on white paper, and punch it out with the scalloped oval punch.  Mount the sentiment on the light blue surface inside the card. Tea Party Invite

To finish it off, tie a bow (mine has multiple loops), and add it to the card front.

Thanks for stopping by!

Blue_Orange

Friday, May 6, 2011

Elegant Bluejay

Inspiration

Here is an elegant card - very formal in its color, embellishments, and design, and a coordinated image inside.  It was featured on the HC Blog on Wednesday, 5/4/2011.

HCDT_ElegantBluejay

Ingredients

Note: Finished Card Size: 5" x 7"


Paper

New England Ivy (CTMH) 7” x 10”, scored at 5”, and
4" x 5"
Champagne Pearl Metallics (Wassau) 4 7/8" x 6 7/8", and
3 7/8" x 4 7/8"
Victorian Patterned Paper in New England Ivy (CTMH) 4 3/4" x 6 3/4", and
3 3/4" x 4 3/4"
Ivory Pure Luxury (GinaK) 3" x 3", and
4 7/8" x 6 7/8"
Stamper's Select White (PTI) 4 1/4" x 5 1/2"

Inks

Memento Tuxedo Black (Tsukineko)
Always Artichoke (SU!)

Stamps

HCPC 3382 Magnificent Cardinal Rose PreCut Set (Heartfelt Creations)
HCPC 3385 Spring Birdies Precut Set (Heartfelt Creations)
HCPC 3389 Sentiments for Mom PreCut Set (Heartfelt Creations)

Accessories

Pearls from Pretties set (SU!)
Glue (Scotch)
COPIC Markers (Imagination International)
Medium Oval Punch (SU!)
Holiday Ribbon (Jo-Anns)
Glue Dots
Scor-Pal
ATG 714 (Scotch)
Rotary Trimmer (Fiskars)

Instructions

Base Card & Ribbon

Score and fold the base card.  Add the champagne and patterned layers.

Cut a length of ribbon about 8" long.  Apply adhesive from the center of the front of the card to the edge on one side.  Adhere one end to the back of the card and around to the top of the card, about 1/2" in.  Now, place a glue dot on the ribbon, and fold the ribbon back toward the edge of the card, sticking it to the glue dot. Create a small loop by folding the ribbon back toward the center of the card and pressing it to the adhesive already on the card.  Place a glue dot, and fold the ribbon back. Create another loop. Repeat this until you have 4 or 5 loops of ribbon, finishing with the tail of the ribbon attached along the remaining adhesive on the card.  Repeat this process on the other side of the card, so you have matching ribbon loops on each side.

Images

Stamp the cardinal on the branch on white. Color with COPIC markers. Here are the colors I used:

  • Bluejay: B41, B45, B37, YR15, 100
  • Flowers: R21, R24, R29
  • Leaves: G94, G99
  • Branch: E27

Carefully trim the entire image.

Assembly

Create another mat stack, using the smaller solid green, champagne, and patterned panels.  Mount this stack over the ribbon on the front of the card.  Glue a pearl embellishment in each corner of the patterned paper, 8 in all.

Stamp the sentiment on the vanilla paper, and punch it out using the oval punch.

Adhere the image and the sentiment to the front of the smaller mat stack on the front of the card.LLW_LargeCardinalGatefold_inside

Inside the Card

Use the large vanilla panel, and stamp the small cardinal/rose image in black.  Color with COPICs, matching the colors you use on the front image.  Stamp your sentiment in green next to the image.  Mount the finished panel inside the card.

Thanks for stopping by!

Blue_Orange

Thursday, May 5, 2011

Gatefold Cardinal


Inspiration

One of my favorite card designs in the gatefold - one of my cards featured on the Heartfelt Creations blog Wednesday is a large gatefold, that measures 5" x 7" when finished instead of the usual 4 1/4" x 5 1/2".  The drawback is that you only get one card from a sheet of cardstock, but I think the result is really nice.

LLW_LargeCardinalGatefold


Ingredients

Note: Finished Card Size: 5" x 7"


Paper

Garden Green (SU!) 7” x 10”, scored at 2 1/2” and 7 1/2"
So Saffron (SU!) 5 1/2" x 8 1/2"
Certainly Celery (SU!) 5 1/2" x 8 1/2"
Stamper's Select White (PTI) 5 1/2" x 8 1/2"

Inks

Memento Tuxedo Black (Tsukineko)
Garden Green (SU!)
Certainly Celery (SU!)
So Saffron (SU!)

Stamps

HCPC 3386 Cheery Cardinal Precut Set (Heartfelt Creations)
HCPC 3387 Luscious Cherry Swirls PreCut Set (Heartfelt Creations)
HCPC 3389 Sentiments for Mom PreCut Set (Heartfelt Creations)

Accessories

Classic Frame Shapeabilities (Spellbinders)
Labels 10 Nestabilities (Spellbinders)
Grand Calibur (Spellbinders)
COPIC Markers (Imagination International)
SPICA glitter pens (Imagination International)
Corner Rounder Punch (SU!)
Sponges
Scor-Pal
Foam Tape
ATG 714 (Scotch)
Rotary Trimmer (Fiskars)

Instructions

Base Card

Score and fold the base card.  Use the solid cherries stamp and green ink to randomly stamp a background on the card.  I actually stamped the cherry background all over the outside of the card, including the back.

Use the corner-rounder punch to round the four corners on the front panels of the card.

Cut and emboss a large label 10 die in yellow, and a classic frame in light green.  On the frame die cut, sponge light green ink in the open areas of the die before removing the paper from die.  For the yellow label die cut, sponge yellow ink around the edges.

Images

Stamp the cardinal on the branch on white. Color with COPIC markers, and enhance with SPICAs. Here are the colors I used:

  • Cardinal: R02, R08, E08, Y15
  • Flowers: R21, R22, Blossom SPICA
  • Leaves: YG16, YG63, YG67, Olive SPICA
  • Branch: E37
  • Cherries:  R20, R24, R27, YG91, YG93, Garnet SPICA

Carefully trim the entire image.  For those areas that are background, but just too delicate to cut out, such as the space between the cherry stems, color with a yellow that will closely match the yellow paper.  I used COPIC Y21.

Assembly

LLW_LargeCardinalGatefold_inside

Attach the yellow label die cut to the left front opening panel of the card, followed by the green frame.  Add the image on top, using foam tape.

Inside the Card

For the inside, I cut a light green panel, measuring 4 7/8" x 6 7/8", and stamped the cherry background in light green ink.  Then I created another yellow label die cut, and sponged the edges.  I stamped a sentiment from the Sentiments for Mom set in dark green and mounted the layers into the card.

Thanks for stopping by!

Blue_Orange

This card has been submitted to these challenges:

Wednesday, April 27, 2011

Female Cardinal For Mom

Inspiration

This week's Heartfelt Creations blog continues to feature the Spring Cardinal collection. I have 4 cards on the HC blog, so I'll post them here on my blog over the next few days.  Be sure to visit the HC blog to see all the beautiful work from the design team – they are really talented!

Today's card is a Mother's Day card with a different take on the cardinal - I was trying to achieve the look of a female cardinal. My coloring is probably a little brighter than a real female of the species, but I found myself concentrating on blending the colors more than the overall look of the bird. Still, I liked the result. This card is also an entry for the Stampin' B's challenge for this week.

LLW_FemaleCardinalForMom_1

Ingredients

Note: Finished Card Size: 5" x 5"

Paper

Bordering Blue (SU!) 5” x 10”, scored at 5”, and
5” x 5”
Bella Birds DSP (SU!) 4 7/8” x 4 7/8”
Pink Pirouette (SU!) 5” x 5”, and a small scrap
Stamper's Select White (Paper Trey Ink) 5” x 5” - 2 pieces

Inks

Memento Tuxedo Black (Tsukineko)
Bordering Blue (SU!)

Stamps

HCPC3383 Cardinal Posy Branch PreCut Set
HCPC3353 Cardinal Family PreCut Set
HCPC3389 Sentiments for Mom PreCut Set

Accessories

HCD706 Cardinal Family Diecuts (Heartfelt Creations)
Labels 1 Grand Nestabilities
Labels 1 Nestabilities
Grand Calibur (Spellbinders)
Medium oval punch (SU!)
Scalloped oval punch (SU!)
COPIC Markers (Imagination International)
Foam Tape
Scissors
ATG 714 (Scotch)
Rotary Trimmer (Fiskars)

Instructions

Image

Stamp the cardinal on the branch on white; stamp a large individual cardinal. Color with COPIC markers. Here are the colors I used:

  • Cardinal: Y21, YR15, R02, R08
  • Flowers: R0000, R10, R11, Y13
  • Leaves/Branch: G94, G99, E77

Cut out the single cardinal using the HC Die. Stamp the posy branch again, and trim out the three largest posies. Color these with COPICs.

Sentiment

Stamp the sentiment in blue ink on white paper, and punch it out with the plain oval punch. Punch out a pink scalloped oval, and mount the sentiment oval on it.

Assembly

Using pink card stock, cut and emboss the smallest Grand Label 1 die. Using blue card stock, cut and emboss the largest Label 1 die. Mount a square of patterned paper on the base card. Then adhere the pink label die cut, followed by the blue label die cut. Mount the full cardinal image on the blue die. Using foam tape, mount the individual cardinal and individual flowers on top of the image. LLW_FemaleCardinalForMom_2Mount the sentiment in the upper right area of the card front.

Final Touches

For the card inside, cut and mount a pink square. Stamp the Mother's  Day greeting in blue on the pink panel.

Thanks for stopping by!

Blue_Orange

Wednesday, April 20, 2011

Spring Cardinals for Mom

Inspiration

I'm happy to be home again from my trip to Tennessee, and back to making cards! It's time to start thinking about May cards, and Mother's Day is a perfect opportunity to give a beautiful keepsake.

And CONGRATULATIONS to Marilyn (newfiecrafter) – she is the lucky winner of the complete Springtime Cardinal release by commenting on the Heartfelt Creations and DT blogs. She is going to love these new images!

Here's another Springtime Cardinal card. The collection includes some really nice sentiments for Mother's Day, and you'll get lots of ideas from all the design team members' samples on the HC blog.

LLW_SpringCardinalForMom

Ingredients

Note: Finished card size is 4” x 6”

Paper

Soft Suede (SU!) 9” x 12”, scored at 4 1/2”
Ivory Swirls & Twirls (Paper Pizazz) 4” x 6”
Stamper's Select White (PaperTrey Ink) 3” x 3 1/2” - 3 pieces
Poppy Parade (SU!) 4” x 6”
Very Vanilla (SU!) 3” x 2”

Inks

Memento Rich Cocoa (Tsukineko)

Stamps

HCPC 3388 Spring Cardinals (Heartfelt Creations)
HCPC 3389 Sentiments for Mom (Heartfelt Creations)

Accessories

HCD 706 Cardinal Family Die (Heartfelt Creations)
HCD 701 Posy Patch Die (Heartfelt Creations)
HCD 711 Decorative Dutch Iris Die (Heartfelt Creations)
Labels 4 Grand Nestabilities (Spellbinders)
Grand Calibur (Spellbinders)
COPIC Markers (Imagination International)
IRock Heat Setter & Jewels (Imaginisce)
Scor-Pal Measuring & Scoring Board
Foam Tape
Scissors
ATG 714 (Scotch)
Rotary trimmer with straight blades (Fiskars)

Instructions

Cut Base Card

Score and fold the brown cardstock to make the base card. To shape it, use the 6" Label 4 die to cut the base card by laying the die just above the folded edge of the scored, folded card base.

Cut the patterned mat layer using the next smallest die. Assemble by mounting the patterned paper layer centered on the base card.

Image

Stamp the image on white paper 3 times. Use the matching cardinal die to cut the bird from one image, and the matching posie die to cut the largest flower from another image. Carefully cut out the entire image from the third copy. Color all the trimmed images with COPIC markers.

  • Bird: R02, R08, E08, Y35, E37, .003 Black Multiliner
  • Posies: R0000, R21
  • Leaves: YG01, YG03

Heat set yellow jewels in the center of the three outer flowers on the main image, and the center of the flower die cut image.

Assembly

Stamp the sentiment on the vanilla paper and trim around it closely.

Use the flourish die from the Dutch Iris Diecuts set to cut and emboss a red flourish. Cut the flourish in half.

Adhere the sentiment, and the red flourish to the patterned mat using adhesive. Mount the full image to the card with foam tape. Add the cardinal die cut image on top of the base cardinal with foam tape. Add the flower die cut image slightly rotated on top of the main flower with foam tape.

Thanks for stopping by.

Orange_Green_Sign

Wednesday, March 2, 2011

Thinking of You in Pink and Green

Celebrate!

Before we get to the card, I have to share a little celebration! Over the past couple of weeks, I’ve been working on 3 projects for a design team contest to one of my favorite companies – Heartfelt Creations.  Today I found out I made the semi-finalist list! I’m SO exited!! They have beautiful stamps and coordinating dies and I’m so honored to be part of the next step in choosing a design team.

My next 3 blog posts will be the projects I created for the first submission, while I’m busy working on the 2 projects for consideration to be a design team member.  Wish me luck!

Inspiration

I was thinking about Mother’s Day when I made this card – every mom loves flowers, right? And spring begs for soft, pastel colors.  I found some patterned paper that is soft in color, with a touch of gold – a really nice base for the card.  Then I chose a flower stamp that I had not used yet, and built this card.

LisaLynneWright_HFCDesignSubmission_Project2_ThinkingOfYou

Ingredients

Paper

Note: finished card size is 5” x 7”

Pink Pirouette (SU!)

7” x 10”, scored at 5”, and
1 1/4” x 6 7/8” – 2 pieces

Pink diamonds patterned paper (K & Company)

4 7/8” x 6 7/8”

Stamper’s Select White (Paper Trey Ink)

5 1/2” x 8 1/2”

Pretty in Pink (SU!)

4 1/4” x 5 1/2”


Ink

Memento Tuxedo Black (Tsukineko)

Versamark (Tsukineko)


Stamps

Angel Trumpet Flowers (Heartfelt Creations)

Kind and Caring Thoughts (SU!)


Accessories

COPIC markers (Imagination International)


Decorative Oval Window Die (Heartfelt Creations)

Petite Scalloped Oval Die (Spellbinders)

Grand Calibur die cut machine (Spellbinders)

Old Gold Inka-Gold paint (Viva Décor)

Gold embossing powder (Stampendous)

Sponge

Heat gun

Gold Pearl Stickers (Recollections)

Bow Easy

Foam tape

Ribbon (Hobby Lobby)

Glue dots

Scor-Pal

Adhesive Transfer Gun 714 (Scotch)

Rotary trimmer with straight blade (Fiskars)

Shimmers spray (Tsukineko)

Instructions

Frame

Cut a window frame using the window die, and die cutting machine. Run it through twice – once to cut, and once to emboss. Before removing the die cut, use sponge to apply gold paint to the embossed design. Let the paint dry, then remove the die cut from the die.

Images

Stamp the trumpet flowers on the white card stock twice. Be sure to stamp one with enough space around it to fill in the window frame. Color with COPIC markers. I used these colors: G21, G40, RV10, RV11, RV13. Using the shimmer spray, spritz the images and let them dry.

Cut out one image in an oval – it doesn’t have to be neat – the window frame will go over it.

From the other image, cut out the four leaves that will overlap the frame, and the front of the three lower flowers. Add gold pearl stickers as the stamens of the flower fronts.

Mount the window frame die cut on the full flower image. Then add the flower fronts and leaves using foam tape.

On the remaining white cardstock, stamp the sentiment in embossing ink, and emboss with gold powder and the heat fun. Cut out the sentiment using the scalloped oval die – again run it through the die cut machine twice.

Assembly

Cut and score the base light pink card. Cut the patterned paper and adhere the panel to the front of the card.

Cut a ribbon and mount it along the middle of one of the narrow pink strips. Mount this narrow panel across the patterned paper about a 1/3 of the way from the top. Mount the second pink strip about 1/3 of the way from the bottom. Add the sentiment at the left end of the lower pink strip.

Mount the trumpets image on the left card.

Tie a bow using the Bow-Easy, and mount with a glue dot on the left of the image.

Thanks for stopping by!

RedSignature

Wednesday, February 2, 2011

Monochromatic Flowers

Inspiration

I’ve now spent 2 days “home-bound” by the ice here in Texas - probably one more to go. We haven’t had any problems - just occasionally the power goes off for 15 minutes at a time. I’ve worked full days thanks to a laptop and VPN at my company, and have actually accomplished more in less time. There’s a lesson in there somewhere…

For the last few cards I’ve made I found I’m on a “keep it simple” design kick, and today’s card is no exception. It could be used for almost any occasion.  All the colors are a shade of teal (one of my favorite colors!).

20110202_MonochromaticFlowerCard

Ingredients

Paper

Note: finished card size is 4 1/4” x 5 1/2”

Baja Breeze (SU!)

  5 1/2” x 8 1/2”; score at 4 1/4”
  2 1/2” x 4 1/8”

Soft Sky (SU!)

  2 3/8” x 4”

Walk in the Park DSP (SU!)

  4” x 5 1/4”

Ink

Baja Breeze (SU!); Soft Sky (SU!)

Stamps

Wonderful You (SU!)

Accessories

Stamp-A-Ma-Jig stamp positioner (EK Success); SPICA glitter pen (Imagination International); Ribbon (Michaels); Bow-Easy; Glue dots; Scor-Pal; Adhesive Transfer Gun 714 (Scotch); Rotary trimmer with straight blade (Fiskars); Scissors

Instructions

Image

The “Wonderful You” stamp set is called a 2-Step set because the stamps come with an outline and with the solid shapes. They produce a really nice effect, and the stamp-a-ma-jig makes it easy to get everything lined up properly. If you’ve never use one before, there’s a quick tutorial file on one of my FAVORITE blogs - Paperfections by Sharon Harnist.

Essentially, line up the plastic sheet in the corner of the T-square, then align the corner of the stamp, and stamp the image on the clear sheet. Use the image on the clear sheet to plan where you want the final stamped image to appear on your paper. Place the T-square in place with the clear sheet, then remove the sheet. Now ink your stamp and use the T-square to stamp it in the exact position where the clear sheet was. Voila! A beautiful image, perfectly aligned.

SO - for this image, use the Stamp-a-ma-Jig to stamp the solid shapes for the flower and leaves in the light blue ink. Then repeat the process to line up the outline of the flower and leaves, and stamp them in the darker blue ink.

Use the glitter pen to add sparkle to the middle of the flower.

Assembly

Adhere a ribbon around the middle of the patterned paper, then mount the patterned paper on the front of the card.

Mount the darker blue mat panel on the right of the front, and the image panel on top of that.

Finish off with a “Bow-Easy” bow mounted with a glue dot to the left of the image.

Final Notes20110202_CardInside

This could be a birthday card, or almost any other occasion. Inside, I added another light blue panel sized 4” x 5 1/4”. I stamped a birthday greeting in the darker blue  shade, using two stamps - together, they made a nice birthday wish. These stamps are from the “Kind and Caring” set by SU!.

Thanks for stopping by!

RedSignature

Thursday, May 7, 2009

Geranium Basket for Mother’s Day

GeraniumBasket Inspiration

I took a class on blending with COPIC markers a couple of weeks ago.  It was taught be Jen Del Muro (i{heart}2stamp.com).  She showed us this fun stamp from My Favorite Things, and I had to get one for myself! 

I also received my new “deckled rectangle” Nestabilities in the mail, so I had to try them out too. 

Having learned a little more about COPICs and blending, I’m starting to experiment with some stamping inks and different papers.  The image here was done on Neenah’s Ultra Smooth using the Adirondack Pitch Black from Ranger.  It certainly absorbs the color a little better than SU!’s Whisper White, but it will take a little practice not to put too much color in a space!

So – this became my Mother’s Day card design – several moms will get this card on Sunday!

Ingredients

CARDSTOCK: Bashful Blue (SU!), Garden Green(SU!), Pretty in Pink(SU!), Ultra Smooth White (Neenah)

STAMPS: Scented Geraniums (My Favorite Things)

INK (all SU): Adirondack Pitch Black (Ranger),Bashful Blue (SU!)

ACCESSORIES:  COPIC Markers; Pink ribbon (Hobby Lobby); Small Deckle Rectangles Nestabilities (Spellbinders); Cuttlebug Die Cut matching (Provo Craft); Foam tape (3M); Bow-Tie; Scor-Pal; Adhesive Transfer Gun 714 (Scotch); Rotary trimmer with straight blade (Fiskars)

Instructions

BASE CARD: Cut a piece of blue cardstock measuring 8 1/2” x 5 1/2”, and score it in the middle at 4 1/4”.

MATS: Cut and emboss 2 deckled rectangles using the Nestabilities dies and Cuttlebug – one green and one pink.  Remember you run it through twice – once to cut, and once to emboss, with different “sandwich” stacks for each purpose.  An excellent reference for the stacks can be found here.  Note that even with these instructions you’ll have to experiment to get the effect on the embossing that you like. 

IMAGES: Stamp the image in black ink on the white paper.  Color with COPICs.  The easiest way to blend colors is to start with the lighter color, then color over it with a darker color, of similar tone, while the lighter color is still wet. Then go back over the edge where the two colors meet with the lighter color again.

Trim the image closely.

ASSEMBLY: Mount the green rectangle on the left of the front of the card.  Mount a piece of pink ribbon measuring 5 1/2” across the card.  Tie a bow, and mount it on the right side of the ribbon using a glue dot.

Mount the pink rectangle, centered on the green rectangle.  Add the image using foam tape for dimension.

Finish the card with a sentiment above the bow in blue ink.

MORE ON COPICS: I’m really new to the COPIC technique, so I’ve been looking for lots of instruction.  The videos are so helpful, and here’s a few that have given me some help:

http://sherrie-cardcreme.blogspot.com/2007/12/first-video-tutorial.html

http://sherrie-cardcreme.blogspot.com/2008/04/video-coloring-tutorial.html

http://sherrie-cardcreme.blogspot.com/2008/01/video-tutorial-wool-you-be-mine.html

Thanks for stopping by!

LinkWithin

Blog Widget by LinkWithin