Wednesday, December 28, 2011

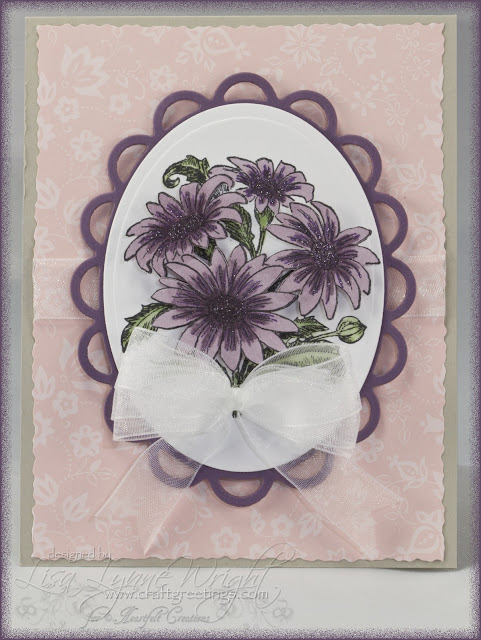
Sparkly Bouquet

Inspiration

This is the last Heartfelt Creations' Wednesday of 2011, and there are lots of beautiful samples for your inspriration on the Heartfelt Creations blog. Be sure to head over to check them all out. And get ready for an exciting 2012 filled with new designs!

My card today is a simple one of pretty flowers mounted on a Spellbinders' die cut mat in my favorite colors - purple & pink. Suitable for any occasion!

SparklyBouquet

Ingredients

Note: Finished card size: 4 1/4" x 5 1/2"

Paper

Saraha Sand
Perfect Plum
Blushing Bride patterned paper (SU!)
Stamper's Select White (Papertrey Ink)

Ink

Memento Tuxedo Black (Tsukineko)

Stamps

HCPC 641: Bluebird with Flowers (Heartfelt Creations)

Accessories

Lacy Oval Nestabilities (Spellbinders)
Classic Oval Large Nestabilities (Spellbinders)
COPIC Markers (Imagination International)
Gelly Roll Pen (Sakura)
White Ribbon (CTMH)
Bow-Easy
3-D Foam Squares (Scrapbook Adhesives)
Zip Dry Paper Glue
ATG (3M)
Scor-Pal
Rotary Trimmer with straight and deckled blades (Fiskars)

Instructions

BASE CARD and MAT LAYER

Cut a piece of sand card stock measuring 4 1/4" x 11", and score it at 5 1/2", and fold. Using a deckled blade, cut a piece of pink patterned paper measuring 4 1/8" x 5 3/8". Mount a strip of ribbon across the middle of the pink paper, and mount the pink mat on the front of the card.

FLOWERS

Cut/emboss a large plain oval from white card stock. Stamp the bouquet image in black ink in the center of the oval. Stamp the flowers again on another piece of white card stock. Color the images with COPIC markers. I used YG61 adn YG63 on the leaves and stems, and V93 and V99 on the flowers. Cut out the 3 "forward" blossoms from the image that is not stamped on the oval. Enhance the centers of the flowers with a Purple Star Gelly Roll pen.

ASSEMBLY

Cut/emboss a purple lacy oval. Mount it on the front of the card with foam squares. Glue the white oval onto the purple lacy oval. Mount the trimmed flowers onto the matching flowers using foam squares. Finish by gluing a bow at the bottom of the sparkly bouquet.

Thanks for stopping by!

Blue_Orange

Sunday, December 25, 2011

Merry Christmas with Love

Inspiration

Merry Christmas, everyone! Here is the Christmas card I made for my dear husband. I cased a lovely card by Fracie G., and gave it a very simple senitment - just "I love you". That says it all.

ChristmasLove

Ingredients

Note: Finished card size: 5 3/4" x 5 3/4"

Paper

Riding Hood Red (SU!)5 3/4" x 11 1/2"; scored at 5 3/4"
Wild Wasabi (SU!)5 1/2" x 5 1/2", and
4" x 4"
Stamper's Select White (Papertrey Ink)5 5/8" x 5 5/8", and
5 3/8" x 5 3/8", and
5" x 5", and
3" x 3"

Ink

Memento Tuxedo Black (Tsukineko)
Wild Wasabi (SU!)

Stamps

HCPC 3339: Elegant Holly Swirls (Heartfelt Creations)
Signature Greetings (Papertrey Ink)

Accessories

Fleur de Lis Rectangle Nestabilities (Spellbinders)
Bella Rose Die (Heartfelt Creations)
Cuttlebug (Provo Craft)
COPIC Markers (Imagination International)
SPICA Glitter Pens (Imagination International)
Adhesive Gems (Recollections)
Zip Dry Glue
3-D Foam Squares (Scrapbook Adhesives)
Scissors
Scor-Pal
ATG (3M)
Rotary Trimmer (Fiskars)

Instructions

BASE CARD

Cut a piece of red card stock measuring 5 3/4" x 11 1/2", score at 5 3/4" and fold. Add a mat of white card stock measuring 5 5/8" x 5 5/8", and a mat of green card stock measuring 5 1/2" x 5 1/2".

SCORED MAT

Cut a piece of white card stock measuring 5 3/8" x 5 3/8". Use a scoring tool, and score 1/2" increments diagonally across the body of the square. Mount this onto the front of the card. Cut/emboss the rose leaf swirl from green card stock and mount in the lower left corner of the white mat.

SENTIMENT

Cut/emboss the large Fleur de Lis rectangle out of white card stock. Stamp the sentiment in green in the center of the rectangle. Mount onto the front of the card using foam squares.

HOLLY IMAGE

Stamp the holly image on white card stock in black ink, and color with COPIC markers. I used YG61, YG63, and YG67 on the leaves, and R35 adn R37 on the berries. Glue the image onto the upper right corner of the sentiment mat. Enhance the holly image with stickles - Burgundy on the berries, and Frosted Lace on the swirls. As the final touch, add a red gemstone at the base of each fleur de lis around the rectangle.

And a Very Merry Christmas

Joe and I are enjoying a quiet day together today; we hope you are enjoying your favorite tradition for this holy holiday. We wish you a safe and merry Christmas!

Thanks for stopping by!

Blue_Orange

Saturday, December 24, 2011

Christmas Gift Card Holders

Merry Christmas Eve!

I've "stamped my fingers off" this December! I counted everything, and between Thanksgiving and today, I stamped and assembled 215 cards. Guess what? I'm tired! LOL. I'm writing my blogs for the weekend ahead of time, and I'm not stamping all weekend. Well, unless I get a really fun stamp or tool for Christmas, or unless I get some free time, or unless...... well, you know me, I'll probably end up stamping something.

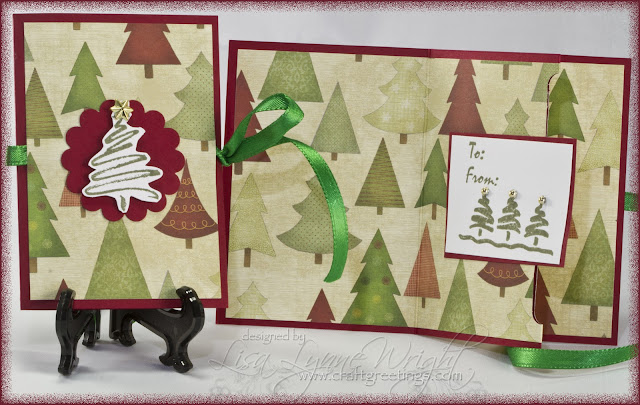
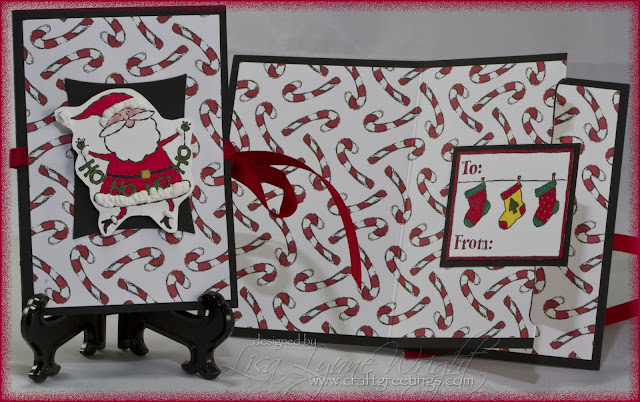
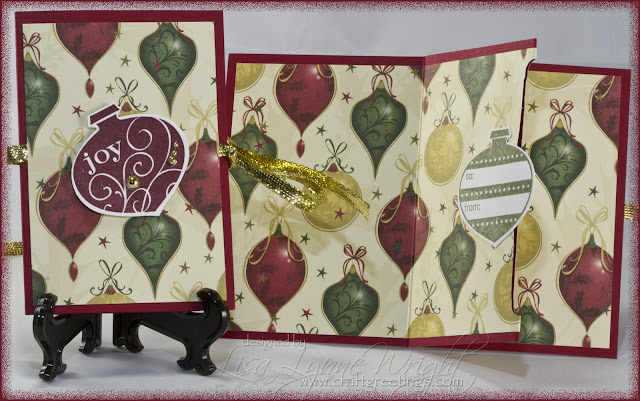
My blog today is pictures only - I posted the instructions for this simple gift card holder in this October post, and as I said back in October, we always end up needing a few holders for gift cards. And I made some for a customer, too. So here are pics of the 9 designs - I made 4 of each. The papers are mostly Stampin' Up, and Paper Studio. The stamps are Stampin' Up, Hampton Art, and Heartfelt Creations. And my craft room was an absolute mess when I was done because I used every kind of marker, glitter, adhesive, ribbon, etc., and didn't put anything away as I went (another reason I'm not stamping for a couple of days).

Anyway, enjoy the pics, and have a wonderful Christmas Eve!


GiftCard1


GiftCard2


GiftCard5


GiftCard4


GiftCard3


GiftCard7


GiftCard6


GiftCard8


GiftCard9


Thanks for stopping by!

Blue_Orange

Wednesday, December 21, 2011

Thanks & A Warm Hug

Special Give Away

This is the last Heartfelt Creations blog post before Christmas, and as a thank you to all the loyal HC customers, Heartfelt Creations will be giving away fifty $50 Dollar Gift Certificates TONIGHT at 9 PM Eastern Time. On the Heartfelt Creations blog at 9 PM EST, you will see a direct link to the giveaway page. Once the page goes live you submit your information and a $50 gift certificate will automatically be emailed to you. Once the 50 gift certificate limit has been reached, it will be indicated on the page. Mark your calenders and make sure you are available at that time, they will be snatched up quickly!

Inspiration

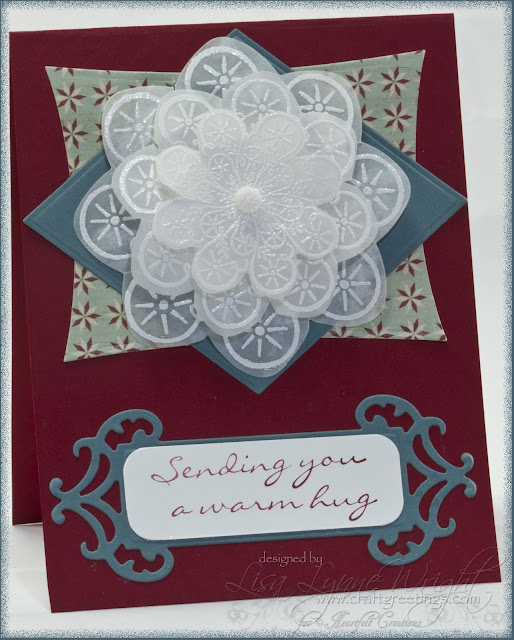
Another card everyone needs lots of this time of year are THANK YOU cards. Here's one made with a wintery theme, using stamps from one of the ***Limited Edition*** sets - these are stamp sets that won't be available for purchase after the end of the year. This set is the Sunburst Flower 2 PreCut Set which coordinates with the Dahlia Spellbinders dies. That makes it easy to make a bunch of cards very quickly!

WarmHug

Ingredients

Note: Finished card size is 4 1/4" x "

Paper

Cherry Cobbler (SU!)7" x 10"; score at 5"
Blue Bayou (SU!)4 3/4" x 6 3/4"
Whisper White (SU!)2" x 3"
Vellum4 3/4" x 6 3/4"
Jingle (lily bee design)4 3/4" x 6 3/4"

Ink

Versamark (Tsukineko)
Cherry Cobbler (SU!)

Stamps

HCPC 2283: Sunburst Flower 2 PreCut Set (Heartfelt Creations)
HCPC 3342: Snowmen Melt Your Heart PreCut Set (Heartfelt Creations)

Accessories

Dahlia Nestabilities Dies (Spellbinders)
Fancy Tags 2 Shapeabilities (Spellbinders)
Classic Diamonds Nestabilities (Spellbinders)
Wonky Rectangles Nestabilities (Spellbinders)
Big Shot Pro (Sizzix)
Corner Rounder Punch (SU!)
White embossing powder (Sweet Stamps)
Heat Gun
3D Foam Squares (Scrapbook Adhesives)
Glitter Adhesive Dots (Recollections)
Zip Dry Paper Glue
ATG (3M)
Scor-Pal
Scissors (Cutter Bee)
Rotary Trimmer (Fiskars)

Instructions

BASE CARD

Cut a piece of red card stock measuring 4 1/4" x 11", and score it at 5 1/2", and fold. Cut/emboss a medium Wonky Rectangle from patterned paper. Cut/emboss a blue diamond. Mount these at the folded end of the base card.

FLOWER

Stamp the 3 flower images using Versamark ink on vellum paper and heat emboss with white embossing powder. Use the matching dahlia dies to cut out all three flowers. Clip between the petals and slightly shape the petals. Use a foam square between each flower to mount them to the blue diamond on the card in a dimensional stack. Finish the flower with a sparkling white adhesive dot in the center of the flower.

SENTIMENT

Cut/emboss a tag from blue paper. Cut a small strip of white paper measuring 7/8" x 2 5/8". Use the corner rounder punch to round all 4 corners of the white strip. Stamp the sentiment in red ink. Mount the white sentiment strip on the blue tag, and the blue tag on the bottom of the card front.

Remember - Tonight's HC Give Away!

Don't forget to head over to the Heartfelt Creations blog tonight at 9 PM EST for your chance to grab a $50 gift certificate!

Thanks for stopping by!

Blue_Orange

Sunday, December 18, 2011

Sparkling Santa

Inspiration

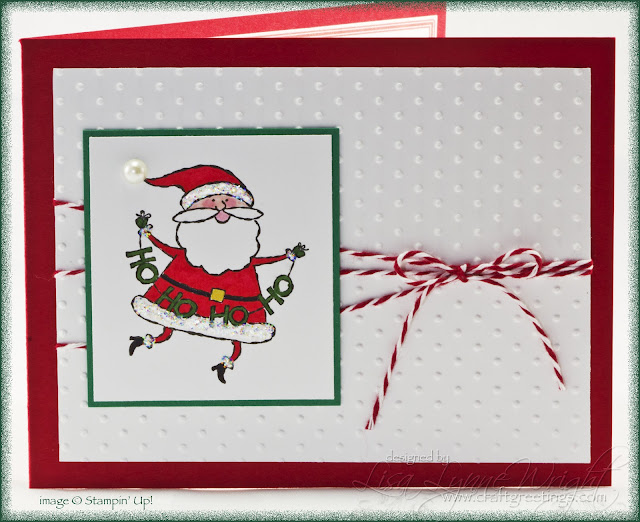
Well, we are down to the final week before Christmas! I had to give in and find a card I could make LOTS of in a short period of time in order to get mine into the mail with any hope of reaching everyone before the holiday. I found inspiration on Splitcoast stampers, and CASEd a card by Nancy Littrell. I made 84 in about 12 hours. Here's my quick & easy card:

SparklingSanta

Ingredients

Note: Finished card size: 4 1/4" x 5 1/2"

Paper

Real red (SU!)4 1/4" x 11"; scored at 5 1/2"
Glorious green (SU!)2 3/8" x 2 5/8"
Whisper white (SU!)3 3/4" x 5", and
2 1/4" x 2 1/2"

Ink

Basic Black (SU!)

Stamps

Holiday Tag Team (SU!)

Accessories

Swiss Dots embossing folder (Provocraft)
Cuttlebug (Provocraft)
Mark-it Ultra-fine Pens (BIC)
Gold metallic pen (Uni-ball)
Pearl adhesive dot (Recollections)
Ice Stickles (Ranger)
Ribbon (Michaels)
Twine (The Twinery)
Clear tape
Scor-Pal
ATG (3M)
Rotary Trimmer (Fiskars)

Instructions

BASE CARD

Start with a half sheet (4 1/2" x 11") of red card stock, score in the middle at 5 1/2", and fold.

MAT LAYERS

Cut a piece of white card stock measuring 3 3/4" x 5", and emboss it with the swiss dots folder. Tape one end of the twine on the back of the white mat, then wrap the twine around the card 3 times and tape it again on the back. Tie a bow around the narrow end of the twine on the front of the white mat. Mount this on the center of the front of the card.

Cut a piece of green paper measuring 2 3/8" x 2 5/8" and mount it to the left of the bow.

IMAGE

Use black ink to stamp the santa on a piece of white card stock measuring 2 1/4" x 2 1/2". Color with the BIC makers, and use the gold pen for the belt buckle. Mount this onto the green mat. Finish with a pearl adhesive on the tip of his cap, and use stickle on all the fur trim.

and REMEMBER - only one more week til Christmas!!!

Thanks for stopping by!

Blue_Orange

Wednesday, December 14, 2011

Special Day Carnation

Inspiration

Happy Wednesday! I am fully into the "Christmas rush" - mass producing Christmas cards, Christmas shopping, full schedule at work, and we've started a home-improvement project in the middle of this too! I didn't even get a Sunday blog posted this past weekend! But, I won't miss a Wednesday with Heartfelt Creations!

ESPECIALLY when they have great give-away news for YOU! As a thank you to all the loyal HC customers, Heartfelt Creations will be giving away 50 (yes, 50) $50 Dollar Gift Certificates on December 21st at 9PM EST. On December 21st, HC will be providing you with the direct link to the giveaway page on the Heartfelt Creations blog, Facebook and email. Once the page goes live you submit your information and a $50 gift certificate will automatically be emailed. Once the 50 gift certificate limit has been reached, it will be indicated on the page. Mark your calenders and make sure you are available at that time, they will be snatched up quickly!

This week, I have an easel card that features stamps from the Artistic Gatefold Collection. Be sure to head over to the Heartfelt Creations blog to check out all the beautiful creations from the design team and look for the winner of the $25 gift certificate!

Special Day Carnation

Ingredients

Note: Finished card size: 5" x 7"

Paper

Soft Suede (SU!)4 1/4" x 11", and
4 1/4" x 5 1/2", and
4 1/4" x 1 1/2" (2 pieces)
So Saffron (SU!)3 3/4" x 5", and
4" x 5 1/4"
Regal Rose (SU!)2 1/2" x 3 1/2" (2 pieces)
Walk in the Park DSP (SU!)3" x 12"
Stamper's Select White (Papertrey Ink)2" x 3", and
1 1/2" x 2 1/2"

Ink

So Saffron (SU!)
Regal Rose (SU!)
Certainly Celery (SU!)

Stamps

HCPC 3435: Feather Grass Flourish PreCut Set (Heartfelt Creations)
HCPC 3436: Rye Grass Flourish PreCut Set (Heartfelt Creations)
HCPC 3437: Carnation Florals 1 PreCut Set (Heartfelt Creations)
HCPC 3438: Carnation Florals 2 PreCut Set (Heartfelt Creations)
HCPC 3363 Inspire Me Sentiments PreCut Set (Heartfelt Creations)
HCPC 3366 Wrought Iron Cross PreCut Set (Heartfelt Creations)

Accessories

Pearl Brads (American Crafts)
Carnation Creations Shapeabilities (Spellbinders)
Classic Ric Rac Edgeabilities (Spellbinders)
Classic Triple Scallops Edgeabilities (Spellbinders)
Big Shot Pro (Sizzix)
Scallop Punch (SU!)
ATG (3M)
Scor-Pal
Rotary Trimmer (Fiskars)

Instructions

BASE CARD

Cut a piece of light green cardstock, measuring 7" x 10", score at 5", and fold.

MAT LAYERS

Cut a piece of burgundy cardstock measuring 4 1/2" x 6 5/8". Cut a piece of patterned paper measuring 3 1/2" x 6 1/2". Mount the patterned paper on the left most side of the burgundy paper, leaving a small border on the left, and a wider border on the right.

Stamp the Christmas sentiment in burgundy ink in the upper third of the patterned paper.

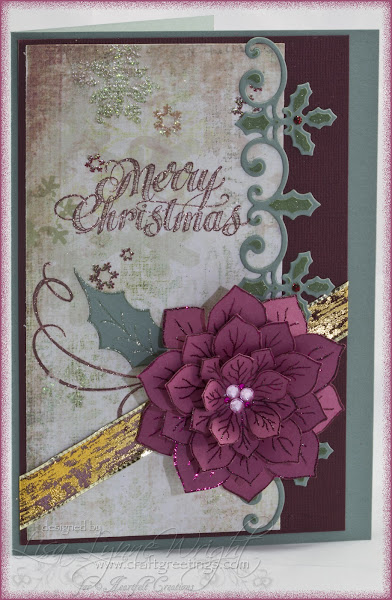
Stamp the holly leaf with the swirl in burgundy ink in the lower third of the patterned paper. Enhance these images with a Clear Star Gelly Roll pen. Stamp the holly leaf again using green ink on light green paper, cut it out, and glue it over the burgundy stamped leaf.

Mount a glittery strip of ribbon diagonally across the lower portion of the mat layers, then mount the layers onto the card front, again leaving a small border at the left, and a larger border on the right.

HOLLY BORDER

Cut/emboss the holly accent border using light green paper. Use a sponge to apply green ink before removing the paper from the die. Trim the die cut pattern to fit the mat layers. Use the dries clear glue to mount the border along the edge of the patterned paper. Enhance the darker green areas with a clear SPICA pen. Use burgundy Stickles for the circle at the base of each group of three leaves.

POINSETTIA

Stamp three poinsettia images using Versamark ink on rose paper, and heat emboss with tranlucent burgundy embossing glitter. Be careful not to overheat - too much heat will flatten the color and sparkle.

Cut out the flowers, and trim into the center of each flower around the whole petals. Bend the five whole petals up, and leave the partial petals flat. Glue the largest poinsettia to the front of the card using Zip-Dry glue so that it covers the intersection of the large holly leaf, the ribbon and the holly border.

Mount the medium poinsettia in the center of the largest using a foam square, and the smallest into the center of the medium blossom using another foam square. Finish with three large light pink and three small dark pink adhesive gems in the center of the poinsettia.

Thanks for stopping by!
Blue_Orange

Wednesday, December 7, 2011

Regal Rose Poinsettia

Inspiration

Hello and welcome to another Heartfelt Creations' Wednesday! Today, on the Heartfelt Creations blog, there's a $25 gift certificate up for grabs, so be sure to hop over and leave a comment!

During December, Heartfelt Creation is featuring ***Limited Edition*** stamps - these are stamp sets that won't be available for purchase after the end of the year. They include some really special sets of flower stamps that you can use in may versatile ways, so be sure to check them out before the end of December!

My card uses the Regal Poinsettia sets in some non-traditional colors for Christmas.

Regal Rose Poinsettia

Ingredients

Note: Finished card size: 5" x 7"

Paper

Ocean Tides (Papertrey Ink)7" x 10", score at 5", and
3" x 7"
Burgundy textured (Kaisercraft)4 1/2" x 6 5/8"
Signature Christmas - Holiday Glitter Book (My Mind's Eye)3 1/2" x 6 1/2"
Autumn Rose (Papertrey Ink)5 1/2" x 8 1/2"

Ink

Versamark (Tsukineko)
Bravo Burgundy (SU!)
Sage Shadow (SU!)

Stamps

HCPC 3419: Holiday Poinsettia Candle PreCut Set (Heartfelt Creations)
HCPC 2292: Regal Poinsettia 1 PreCut Set (Heartfelt Creations)
HCPC 2291: Regal Poinsettia 2 PreCut Set (Heartfelt Creations)

Accessories

Holly Accents Shapeabilities (Spellbinders)
Big Shot Pro (Sizzix)
SPICA glitter pen (Imagination International)
Gelly Roll pen (Sakura)
Ribbon (Michaels)
Translucent Embossing Glitter (PK Glitz)
Heat Gun
Sponge
Stickles (Ranger)
Adhesive Gems (Recollections)
3-D Foam Squares (Scrapbook Adhesives)
Scor-Pal
Art Institute Glue - Dries Clear
Zip Dry Glue
Adhesive Transfer Gun
Rotary Trimmer (Fiskars)

Instructions

BASE CARD

Cut a piece of light green cardstock, measuring 7" x 10", score at 5", and fold.

MAT LAYERS

Cut a piece of burgundy cardstock measuring 4 1/2" x 6 5/8". Cut a piece of patterned paper measuring 3 1/2" x 6 1/2". Mount the patterned paper on the left most side of the burgundy paper, leaving a small border on the left, and a wider border on the right.

Stamp the Christmas sentiment in burgundy ink in the upper third of the patterned paper.

Stamp the holly leaf with the swirl in burgundy ink in the lower third of the patterned paper. Enhance these images with a Clear Star Gelly Roll pen. Stamp the holly leaf again using green ink on light green paper, cut it out, and glue it over the burgundy stamped leaf.

Mount a glittery strip of ribbon diagonally across the lower portion of the mat layers, then mount the layers onto the card front, again leaving a small border at the left, and a larger border on the right.

HOLLY BORDER

Cut/emboss the holly accent border using light green paper. Use a sponge to apply green ink before removing the paper from the die. Trim the die cut pattern to fit the mat layers. Use the dries clear glue to mount the border along the edge of the patterned paper. Enhance the darker green areas with a clear SPICA pen. Use burgundy Stickles for the circle at the base of each group of three leaves.

POINSETTIA

Stamp three poinsettia images using Versamark ink on rose paper, and heat emboss with tranlucent burgundy embossing glitter. Be careful not to overheat - too much heat will flatten the color and sparkle.

Cut out the flowers, and trim into the center of each flower around the whole petals. Bend the five whole petals up, and leave the partial petals flat. Glue the largest poinsettia to the front of the card using Zip-Dry glue so that it covers the intersection of the large holly leaf, the ribbon and the holly border.

Mount the medium poinsettia in the center of the largest using a foam square, and the smallest into the center of the medium blossom using another foam square. Finish with three large light pink and three small dark pink adhesive gems in the center of the poinsettia.

Thanks for stopping by!

Blue_Orange

Sunday, December 4, 2011

You + Me = Friendship

Inspiration

Here's a card I made for a friend who also has a November birthday. I'm very drawn to the letterpress effect - it seems so elegant. I've been trying the letterpress plates, but still haven't quite perfected the use yet. I can't get the whole piece of paper clean, so I finally just cut out the image and used it by itself!

YouPlusMe

Ingredients

Note: Finished card size: 4 1/4" x 5 1/2"

Paper

Basic Black (SU!)8 1/2" x 11"; scored at 5 1/2"
Creamy Caramel (SU!)5 3/8" x 8 3/8"
Lap of Luxury DSP (SU!)5" x 7"
Bravo Burgundy (SU!)5" x 5 1/4"
Stamper's Select White (Papertrey Ink)5" x 5", and
3 1/4" x 4", and
1 1/4" x 2 1/4"

Ink

Memento Tuxedo Black (Tsukineko)
Bravo Burgundy (SU!)

Stamps

JavaBellas (Stamping Bella)
Sweet Serendipity (SU!)

Accessories

Classic Triple Scallop Edgeabilities (Spellbinders)
Classic Bracket Edgeabilities (Spellbinders)
Wonky Rectangles Nestabilities (Spellbinders)
Corner Trellis Letterpress Plate (Sizzix)
Key Tag Punch (SU!)
Big Shot Pro (Sizzix)
Ribbon (Michaels)
Bow-Easy
COPIC Markers (Imagination International)
SU! Markers
Quickie Glue Pen (Sakura)
Shell White Microfine Glitter
Zip-Dry Glue
3-D Foam Squares (Scrapbook Adhesives)
Foam tape (Scotch)
Scissors (Cutter Bee)
Scor-Pal
ATG (3M)
Rotary Trimmer (Fiskars)

Instructions

BASE CARD

Start with a whole sheet (8 1/2" x 11") of black card stock, score in the middle at 5 1/2", and fold.

MAT LAYERS

Cut a piece of caramel card stock measuring 5 3/8" x 8 3/8", and cut/emboss one short end using the edger die from the Triple Scallop Edgeabilities set, and the Fleur de Lis decorative insert from the Classic Bracket set.

Cut a piece of patterned paper measuring 5" x 7". Mount a strip of ribbon across the middle, and mount the patterned paper onto the caramel card stock mat. Mount the mat layers onto the front of the card.

IMAGE

Use black ink on the letterpress plate, and press the corner image into a square of white card stock. Trim the pressed image out.

Stamp the image in black ink on white paper, and cut/emboss the image using a wonky rectangle die that allows room for the whole image.

Color most of the image with COPIC markers. I used these colors:

  • Skin: E0000, E00, R11
  • Hair: Y11, E15, E18
  • Capris: E30, E33
  • Chairs/Table: B32, W0, W4
  • Vase/Rose: B00, R81
  • Coffe Cups: E30, E47

For the sparkly shirt and dress, fill in the areas with the quickie glue pen, and cover in the microfine glitter. Then color over the glitter with the SU! markers. I used Sage Shadow for the shirt and matching shoes, and Bravo Burgundy for the dress and matching shoes.

Cut a burgundy card stock piece measuring 5" x 5 1/4", and mount on the card front. Mount the image in the lower right area of the burgundy mat. Add the trimmed letterpress to give the appearance of an awning using foam squares. Tie a bow matching the ribbon, and mount in the upper right corner of the image.

SENTIMENT

Stamp the sentiment in burgundy ink on white card stock, and punch it out using the Key Tag punch. Mount it to the left of the "awning" with foam tape (using foam tape makes it fit under the already mounted awning).

Thanks for stopping by!
Blue_Orange

Thursday, December 1, 2011

Poppy Thanks

Inspiration

I mentioned in my Sunday post that I made Thank You cards for last week's birthday gifts. This is the second card design for that purpose. On this one, I used another pretty flower image from Heartfelt Creations' Artistic Gatefold Collection.

Artistic Birthday Gatefold

Ingredients

Note: Finished card size: 4 1/4" x 5 1/2"

Paper

Pear Pizzaz4 1/4" x 11", scored at 5 1/2"
Blush Blossom4 1/4" x 5 1/2"
Marina Mist1 1/2" x 3 1/2"
Stamper's Select White4 1/4" x 5 1/2"

Ink

Memento Tuxedo Black (Tsukineko)
Marina Mist (SU!)

Stamps

HCPC 3439: Flirty Fleurs PreCut Set (Heartfelt Creations)
HCPC 3328 Swirly Autumn Leaves PreCut Set (Heartfelt Creations)

Accessories

Flowers & Flourish Embossing Folder (Sizzix)
Ribbon Tag Trio 3 Shapeabilities (Spellbinders)
Cuttlebug (Provocraft)
Ribbon (Michaels)
COPIC Markers (Imagination International)
Liquid Pearls (Ranger)
Gelly Roll pen (Sakura)
3-D Foam Squares (Scrapbook Adhesives)
Scor-Pal
ATG (3M)
Rotary Trimmer (Fiskars)

Instructions

BASE CARD

Cut a piece of green cardstock, measuring 4 1/4" x 11", score at 5 1/2", and fold.

SENTIMENT

Cut/emboss a ribbon tag using blue cardstock, and stamp the sentiment in blue ink in the center of the tag. Thread pink ribbon through the tag and mount at the top of the card front.

EMBOSSED LAYER

Use a piece of pink paper measuring 4 1/4" x 5 1/2" to emboss the floral pattern with the embossing folder. Trim around the embossed portion of the pattern. Mount on the front of the card.

IMAGES

Stamp the flower image on white paper with black ink, and trim closely. Stamp the two large flowers again, and trim them closely, as well. Color the images with COPIC markers. I used these colors:

  • Large flowers - R12, R14
  • Small flowers - B91, B95
  • Leaves - YG0000, YG03

Enhance the center of the individual large flowers with a Clear Star Gelly Roll pen. Mount the full image on the card front. Add the individual flowers on top of the matching flowers using foam squares. Add White Opal Liquid Pearls to the center of the blue flowers.

Thanks for stopping by!

Blue_Orange

Wednesday, November 30, 2011

Artistic Gatefold Birthday

Inspiration

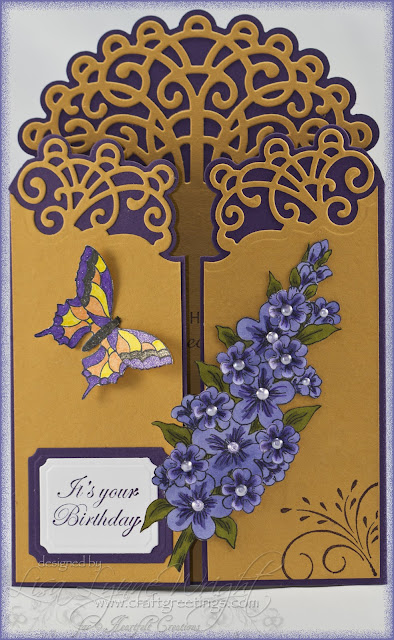
Today is my dear mother-in-law's birthday, and I used the new Artistic Gatefold Collection from Heartfelt Creations to create a fancy gatefold card for her. There is an excellent instructional video on the Heartfelt Creations websit that will show you step-by-step how to use the special dies that are part of this collection to create this beautiful type of gatefold card - they really make it a breeze!

Check the HC Blog

Be sure to head over to the Heartfelt Creations blog to find out the lucky winner of the entire collection, and of course, all the beautiful creations of the design team members.

Artistic Birthday Gatefold Outside

Artistic Birthday Gatefold Inside

Ingredients

Note: Finished card size: 4 1/2" x 7"

Paper

Elegant Eggplant7" x 9"; scored at 2 1/4" and 7 1/4", and
1 1/2" x 2"
More Mustard4 1/2" x 7", and
2 1/4" x 7" (2 pieces)
Stamper's Select White4 1/4" x 5 1/2", and
1 1/2" x 2"

Ink

Memento Tuxedo Black (Tsukineko)
Elegant Eggplant (SU!)

Stamps

HCPC 3435: Feather Grass Flourish PreCut Set (Heartfelt Creations)
HCPC 3439: Flirty Fleurs PreCut Set (Heartfelt Creations)
HCPC 3392 Bella Rose House PreCut Set (Heartfelt Creations)
HCPC 3388 Spring Cardinals PreCut Set (Heartfelt Creations)
HCPC 3363 Inspire Me Sentiments PreCut Set (Heartfelt Creations)

Accessories

HCD 716: Layered Elegant Swirl Die (Heartfelt Creations)
HCD 701: Posy Patch Die (Heartfelt Creations)
Labels Small Nestabilities (Spellbinders)
Labels Large Nestabilities (Spellbinders)
Big Shot Pro (Sizzix)
COPIC Markers (Imagination International)
SPICA Markers (Imagination International)
Liquid Pearls - Lavender Lace (Ranger)
Designer Dries Clear Glue (Art Glitter Glue)
Zip-Dry Glue
Stamp-A-Ma-Jig (EK Success)
ATG (3M)
Rotary Trimmer (Fiskars)

Instructions

BASE CARD

Be sure to check out the instructional video for using the Layered Elegant Swirl Die set on a gatefold card - I followed Emma Lou's instructions exactly to create this card! I used the dark purple cardstock for the base, and yellow for the intricate die cuts.

IMAGES

Stamp the stalk of flowers on white cardstock in black ink on white paper. Cut out the entire image, trimmed closely. Stamp 7 small posy blossoms on white cardstock in black ink. Use the matching Posy Patch die to cut all the blossoms out.

Color the images with COPIC markers. For the leaves, I used YG95 and YG99. For the blossoms, I used BV02 and BV08, and enhanced them with a Lavender SPICA marker. Use the Paper Blossoms kit to shape the 7 individual blossoms.

Stamp the butterfly on white cardstock in black ink on white paper, and color with SPICA markers. I used Pitch Black, Orange, Lavender, and Lemon.

SENTIMENT

Stamp the birthday sentiment in purple ink on white paper, and cut/emboss with the next-to-smallest Label Small Nestabilities die. Using dark purple cardstock, cut/emboss a next-to-smallest Label Large Nestabilities die. Mount the sentiment panel onto the purple die cut.

CARD INSIDE

Use the Stamp-A-Ma-Jig to stamp the long flourish on the sides of the inside panel, using dark purple ink. Stamp the special day sentiment in the center using dark purple ink.

CARD FRONT

Use the Stamp-A-Ma-Jig to stamp a small flourish in the lower right corner of the front right panel, using dark purple ink. Mount the flower stalk on the right panel, rotated slightly. Use Zip-Dry to mount the individual blossoms on top of the small flowers in the stalk. Use Lavender Lace Liquid Pearls in the center of the blossoms.

Mount the butterfly on the upper left portion of the front left panel. Mount the sentiment on the lower left portion of the front left panel.

Thanks for stopping by!

Blue_Orange

Sunday, November 27, 2011

Thankful Thoughts

Inspiration

I had a birthday last week, and had so many wonderful greetings - cards, phone calls, emails, and facebook posts! And a couple of gifts!! Which, of course, require Thank You notes. A made a couple of designs - here's the first one (the next one will be one of my Heartfelt Creation posts next week...) This one is a simple one - not too many ingredients, and quick to put together.

Artistic Birthday Gatefold

Ingredients

Note: Finished card size: 4 1/4" x 5 1/2"

Paper

Soft Suede5 1/2" x 8 1/2", scored @ 4 1/4"
Early Espresso2 5/8" x 3 5/8" (2 pieces), and
2 3/8" x 3 3/8", and
1 1/8" x 3 1/8"
Vintage Ivory2 1/4" x 3 1/4", and
1" x 3", and
4" x 5 1/4"
Cafe Mediterranean Stack (DCWV)2 1/2" x 3 1/2" (2 pieces)

Ink

Memento Rich Cocoa (Tsukineko)

Stamps

HCPC 972 Flower Container PreCut Set (Heartfelt Creations)
Thoroughly Thankful (SU!)

Accessories

COPIC Markers (Imagination International)
Scor-Pal
ATG (3M)
Rotary Trimmer (Fiskars)

Instructions

BASE CARD AND MATS

Cut a piece of light brown cardstock measuring 5 1/2" x 8 1/2", score at 4 1/4", and fold.

Cut 2 pieces of dark brown cardstock measuring 2 5/8" x 3 5/8". Cut 2 coordinating pieces of patterned cardstock measuring 2 1/2" x 3 1/2". Mount the patterned paper pieces on the dark brown cardstock pieces. Mount these onto the card front, in the upper left and lower right corners.

IMAGE

Stamp the flower image in brown ink on a piece of ivory cardstock measuring 2 1/4" x 3 1/4". Color with COPIC markers. I used these colors:

  • Flowers: E11, E19
  • Leaves: YG93, YG95
  • Bucket: E55, E57, W7
  • Background: BG0000, BG000

Cut a piece of dark brown cardstock measuring 2 3/8" x 3 3/8". Mount the colored image on this dark brown mat, then mount this on the card front, leaving space at the bottom of the card for the sentiment.

SENTIMENT

Stamp the senetiment image in brown ink on a piece of ivory cardstock measuring 1" x 3", and mount it on a piece of dark brown cardstock measuring 1 1/8" x 3 1/8". Mount this at the bottom of the card front.

INSIDE

I mounted a plain piece of ivory cardstock measuring 4" x 5 1/4" on the inside of the card, so I could write my message of thanks.

Thanks for stopping by!
Blue_Orange

Saturday, November 26, 2011

Love Note

Inspiration

Here's another card made with the Artistic Gatefold Collection from Heartfelt Creations. This release has so many possibilities, I haven't even begun to scratch the surface! I got the idea for this card from a book called "Folding Ideas for Cards and Envelopes" by Laurence K. Withers. I played with the folding a few times before I got it down, but it's not too hard. I do like the effect - it's a 4x4 card when closed (inset picture), and opens to reveal an intricate die cut arch, using the newly released Layered Scalloped Posy Die!

Love Note

Ingredients

Note: Finished card size: 4" x 4"

Paper

Soft Sky Textured (SU!)6" x 12"; scored at 4" and 8"
Madeline (Prima)3 7/8" x 3 7/8" (4 pieces)

Ink

Early Espresso (SU!)

Stamps

HCPC 3435: Feather Grass Flourish PreCut Set (Heartfelt Creations)
HCPC 3436: Rye Grass Flourish PreCut Set (Heartfelt Creations)

Accessories

HCD 717: Layered Scalloped Posy Die (Heartfelt Creations)
Big Shot Pro (Sizzix)
Waxed Paper
SPICA pen (Imagination International)
Designer Glue (Art Glitter Glue)
Stamp-A-Ma-Jig
Scor-Pal
ATG (Scotch)
Scissors (Cutter Bee)
Rotary Trimmer (Fiskars)

Instructions

BASE CARD

Cut a piece of light blue paper measuring 6" x 12", and score it at 4" and 8". Turn the card length-wise and score lightly at 4" (this will be come a guide for cutting later).

LoveNote_Step1

Fold on the 8" score line. Lay the half-circle lacy die from the HCD 717 set on the folded line, so that the center of the die is on the folded line. Trace lightly with a pencil around the outside of the die, so that you have a quarter-circle traced to the scored line.

LoveNote_Step2

Now, cut through both layers along the traced quarter-circle, until you reach the scored line. When you reopen the card, you have a half-circle cut in the card. Use your rotary trimmer to cut along the long score line, but don't cut through the half-circle.

LoveNote_Step3

CARD FRONT

Cut a piece of patterned paper measuring 3 7/8" x 3 7/8". Stamp the Love flourish in brown ink in the center of the paper and a flourish in the upper right and lower left corners. Embellish all of the stamped the images with a Chocolate SPICA pen. Distress all 4 edges of the patterned paper with the distress tool, curl the upper left and lower right corners of the paper, and mount on the front panel of the card.

INSIDE

Cut/emboss the lacy half-circle die from the patterned paper and glue it to the half-circle portion of the inside of the card. Cut 2 pieces of patterned paper measuring 3 7/8" x 3 7/8", one with a patterned edge, and one more plain. Stamp the corner flourish in one corner of the plain square. Mount this piece on the right side of the inside of the card. Mount the patterned edge piece on the left side of the inside.

FINAL FOLD

Turn the card over and measure 4" down from the top of the half-circle, and make a small mark. Score from each corner of the half-circle to the 4" mark, forming a "V".

LoveNote_Step3

Fold along the V, so that the half-circle folds inside the card as the card closes. As the final step, glue back of the card front panel to the back of the left inside panel.

And Don't Forget!

Be sure to leave a comment on the Heartfelt Creations blog by November 29 for a chance to win the entire release valued at $150. The winner will be announced on the HC blog on November 30.

Thanks for stopping by!

Blue_Orange

Friday, November 25, 2011

Artistic Gatefold Release

Inspiration

Heartfelt Creations releasing a new collection on "Black Friday" that is simply genious! It is called the Artistic Gatefold Collection, and features 6 new precut stamp sets that coordinate with existing Spellbinders dies and 2 new exclusive dies. These dies will decorate a gatefold card like no other!

Help a Charity When You Buy

Heartfelt Creations will be donating 10% of all Black Friday sales towards ChildCry, a non-profit feeding organization founded by Times Square Church. ChildCry feeds over 4159 kids in 22 different countries, including the United States. Every penny donated to ChildCry is used to buy food for hungry children so go ahead...feed your hobby, and a hungry child! You can view all the details by following this link: www.childcrynyc.org. So, head over to the Heartfelt Creations blog to check out the new release, the designers' beautiful work with this release, and pick up some stamps and dies!

A Bonus For You

And, be sure to leave a comment on the Heartfelt Creations blog by November 29 for a chance to win the entire release valued at $150. The winner will be announced on the HC blog on November 30.

My Card

I have 2 cards on the HC blog this week. My first is a basic gatefold card featuring the vintage door, and the pretty carnation stamps that coordinate with the Carnation Creations dies from Spellbinders. The card front is the inset photo, and the inside is the main picture. I'll post my second one tomorrow - it features a new fancy fold, so be sure to check back tomorrow!

A Friend's Door

Ingredients

Note: Finished card size: 4 1/4" x 5 1/2"

Paper

Early Espresso (SU!)5 1/2" x 8 1/2"; scored at 2 1/8" x 6 3/8", and
2 3/4" x 4"
Natural Ivory (SU!)2 3/4" x 4", and
4" x 5 3/8"
Blushing Bride (SU!)3 1/2" x 5 1/2"
Sage Shadow (SU!)2" x 4"
It's the Little Things (Fancy Pants)2" x 5 3/8" (2 pieces)

Ink

Early Espresso (SU!)
Regal Rose (SU!)
Sage Shadow (SU!)

Stamps

HCPC 3437: Carnation Florals 1 PreCut Set (Heartfelt Creations)
HCPC 3438: Carnation Florals 2 PreCut Set (Heartfelt Creations)
HCPC 3440: Vintage Door PreCut Set (Heartfelt Creations)

Accessories

Carnation Creations Shapeabilities (Spellbinders)
Fancy Tags Shapeabilities (Spellbinders)
Big Shot Pro (Sizzix)
Adhesive Pearls (Recollections)
Zip-Dry Glue
Scor-Pal
ATG (Scotch)
Scissors (Cutter Bee)
Rotary Trimmer (Fiskars)

Instructions

BASE CARD

Start with a piece of dark brown card stock measuring 5 1/2" x 8 1/2", score at 2 1/8" and 6 3/8", and fold inward. Cut 2 pieces of patterned paper measuring 2" x 5 3/8". Mount one on each front flap of the card.

DOOR

Cut a piece of dark brown card stock measuring 2 3/4" x 4". Stamp the door image in dark brown ink on ivory card stock, and trim closely. Mount the door image on the brown card stock, and mount the door image stack on the left front flap of the card.

CARNATIONS

Stamp the 3 smallest carnation images in pink ink on pink paper 3 times. Use the matching Carnation Creation dies to cut all the images out. Bend the petals of each die cut and glue the flowers in stacks at the lower left corner of the door. As you add a layer, turn it slightly so that the petals are offset rather than matched up evenly. Add an adhesive pearl in the center of each flower.

INSIDE

Cut a piece of ivory card stock measuring 4" x 5 3/8" and mount on the inside center panel. Stamp the 3 smallest carnation images in pink ink on pink paper 1 time. Stamp the 3 leaves in green ink on green paper. Use the matching Carnation Creation dies to cut all the images out. Glue the leaves in the lower left corner of the inside panel. Add the flower layers, and an adhesive pearl in the center. Cut/emboss a fancy tag in dark brown card stock and mount across the upper portion of the center panel of the card. Cut the same tag from ivory, and trim out the center rectangle. Stamp the sentiment in dark brown ink on the ivory rectangle and mount this on the tag.

Thanks for stopping by!

Blue_Orange

Sunday, November 20, 2011

Blue Birthday Bouquet

Inspiration

Watercolor crayons are one of the simplest way to learn how to blend colors, and when you use watercolor paper it's correctable - just add water! I keep a little bowl of water and a paper towel next to my work area and if I get too much color or go over a line, I can use a clean brush with water to clean up the area and blot it with the paper towel and start over. It's a great medium to work with.

Here's an easy little card that I used based on a old sketch challenge on Splitcoast Stampers (Sketch 232) and one of my favorite Stampin' Up! stamp sets ever, called In Full Bloom. I actually stamped it 4 times and painted all 4 images, and had 4 cards in no time!

BlueBirthdayBouquet

Ingredients

Paper

Baja Breeze (SU!)4 1/4" x 11"; scored at 5 1/2"
Baja Breeze DSP (SU!)1 1/2" x 5 1/2"
Cherry Cobbler (SU!)2" x 2"
More Mustard (SU!)2" x 2"
Watercolor paper (Canson)2 3/4" x 3 1/2"

Inks

Jet Black (StazOn)

Stamps

In Full Bloom (SU!)

Accessories

Watercolor Crayons (SU!)
Watercolor brush
Water
Post-It Notes
Scor-Pal
ATG (Scotch)
Scissors (Cutter Bee)
Rotary Trimmer (Fiskars)

Instructions

IMAGE

Stamp the large open flower in the center using black ink on the watercolor paper in the upper right corner. Stamp it on a post-it note, and cut it out and cover the image on the watercolor paper. Stamp the half-daisy image in black ink on each side of the center flower - it's ok if it goes off the edge of the paper. Add the stems and leaves.

Use the watercolor crayons and brush and water to color the images. I used heavy color around the edges of the image, then cleaned the brush and lightly dragged the color toward the center of each area. This is where you exercise your creativity - do what you like!

ASSEMBLY

Cut a piece of blue cardstock measuring 4 1/4" x 11", score at 5 1/2" and fold. Mount a strip of blue patterned paper measuring 1 1/2" x 5 1/2" across the center of the card front.

Cut 2" x 2" squares of red and yellow card stock. Adhere the watercolored image on the red square, and the yellow square, then mount the whole set on the right side of the front of the card.

Thanks for stopping by!

Blue_Orange

Wednesday, November 16, 2011

Poinsettia Gift Box

Inspiration

Welcome to another Heartfelt Creations Wednesday! Just in case you're wondering where the November release is, we're doing a special release on Black Friday next week and it's one worth waiting for. There's a "sneak peek", along with the weekly dose of beauty and creativity from the design team on Heartfelt Creations blog!

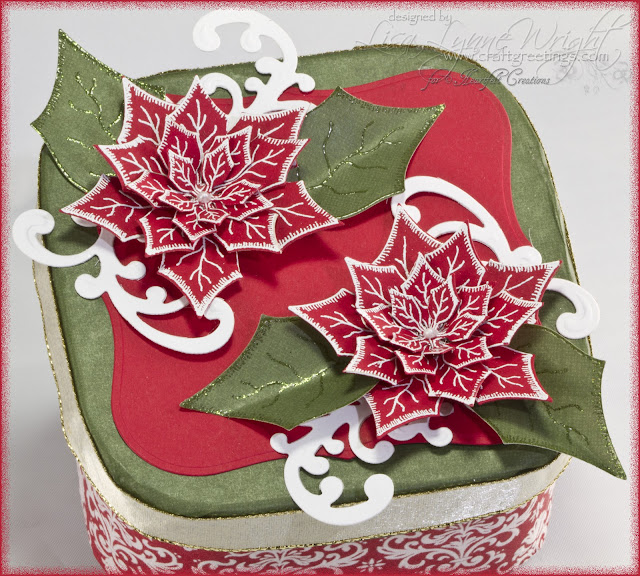
The holidays are upon us, and if you're like me, you want your gifts to show you've spent some time and special work on the creations you give. Paper mache boxes are perfect for decorating, and Heartfelt Creations stamps are great for adding flowers and flourishes! This one is decorated for Christmas in traditional red and green, with the Petite Poinsettia PreCut Set.

Poinsettia Gift Box

Ingredients

Note: Finished box size: approximately 6" x 6"

Paper

Christmas Cocoa Specialty (SU!)4" x 12" (2 pieces)
Real Red (SU!)8 1/2" x 11"
Victorian B&T New England Ivy (CTMH)7" x 7", and
4" x 4"
Stamper's Select White (Papertrey Ink)4" x 4"

Ink

Versamark (Tsukineko)

Stamps

HCPC 3415: Petite Poinsettia PreCut Set (Heartfelt Creations)

Accessories

Paper Mache Box (Hobby Lobby)
HCD 711: Decorative Dutch Iris Die (Heartfelt Creations)
Layered Poinsettia Shapeabilities (Spellbinders)
Labels 1 Grand Nestabilities (Spellbinders)
Big Shot Pro (Sizzix)
White embossing powder (Sweet Stamps)
Moss Tinsel Embossing Powder (Creations Unlimited)
Heat Gun
Liquid Pearls (Ranger)
Ribbon (Michaels)
Modge Podge glue
Zip-Dry Glue
Scissors (Cutter Bee)
Rotary Trimmer (Fiskars)

Instructions

BOX BOTTOM

Cut two 4" x 12" strips of red/white flocked paper. Apply Modge Podge glue to the outside of the box and adhere the flocked paper to cover the sides of the box. The paper is wider than the box sides, so clip the paper at the corners of the box, and apply Modge Podge to glue the paper as you fold it under the bottom of the box and to the inside of the box.

Cut a 4" x 4" square of solid red paper to cover the bottom of the box and glue it in place to hold the edges of the paper in place under the box. Set the box aside to let it dry.

BOX LID

Cut a sheet of green paper measuring 7" x 7". Apply Modge Podge glue to the outside of the box lid and adhere the green paper to cover the lid. Clip the paper at the corners of the lid, and apply Modge Podge to the sides of the lid, and glue the paper down to cover the sides of the lid. Use Zip-Dry glue to adhere ribbon around the edge of the lid. Set the lid aside to let it dry.

POINSETTIAS

Stamp 2 of each size of the poinsettia blossoms on red paper using embossing ink, and heat emboss with white powder. Cut them all out with the matching Shapeabilities dies.

Stamp 4 leaves on green paper using embossing ink, and heat emboss with moss tinsel powder. Cut them out with the matching Shapeabilities die.

Cut/emboss 2 flourishes using the die from the Dutch Iris die set and white card stock.

From red card stock cut/emboss the smallest Label 1 Grand Nestabilities die.

Glue the red Label die cut onto the box lid. Adhere a white flourish in two corners. Glue the poinsettias in the crook of the flourishes - "scrunch" the petals slightly to give them a little more 3-D look. Finish the poinsettias with a drop of Opal Liquid Pearls in the centers. Fold the leaves slightly in the middle, and glue them under the poinsettias.

Thanks for stopping by!

Blue_Orange

Tuesday, November 15, 2011

Happy Graduation

Inspiration

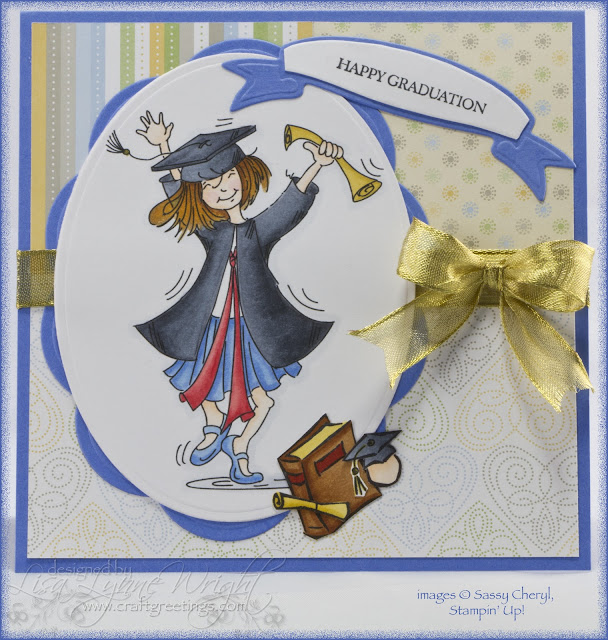
I received an order for a December graduation card for a college grad, and had time this weekend to put it together. The image is a fun digital stamp from "Sassy Cheryl" I found doing a quick "graduation digital stamp" Google search. I used the Sketch Saturday Challenge #181 for the layout.

HappyGraduation

Ingredients

Note: Finished card size is 5 1/2" x 5 1/2"

Paper

Ballet Blue (SU!) 5 1/2" x 11"; scored at 5 1/2", and
4 1/2" x 5 1/2", and
1 1/2" x 4"
Delicate Dots DSP (SU!) 2 3/8" x 5 1/4", and
2 3/8" x 2 3/8" (2 pieces)
Stamper's Select White (Papertrey Ink) 4 1/2" x 5 1/2", and
2" x 4" (2 pieces)

Inks

Memento Tuxedo Black (Tsukineko)

Stamps

Frantic Graduation Girl (Sassy Cheryl)
Tassel Time (SU!)
Teeny Tiny Wishes (SU!)

Accessories

Big Shot Pro (Sizzix)
Ribbon Banners Shapeabilities (Spellbinders)
Big Scalloped Circles GRAND Nestabilities (Spellbinders)
Large Petite Oval Nestabilities (Spellbinders)
SPICA Markers (Imagination International)
COPIC Markers (Imagination International)
Wire-edged ribbon (Michaels)
Bow-Easy
Zip-Dry Glue
Scor-Pal
ATG (Scotch)
Scissors (Cutter Bee)
Rotary Trimmer (Fiskars)

Instructions

BASE CARD

Cut a piece of blue card stock measuring 5 1/2" x 11", score at 5 1/2" and fold. Cut one piece of patterned paper measuring 2 3/8" x 5 1/4" and adhere across the bottom half of the card front. Cut one piece of another patterned paper measuring 2 3/8" x 2 3/8" and adhere in one corner of the top half of the card front. Cut a third piece of patterned paper measuring 2 3/8" x 2 3/8" and adhere in the remaining corner of the top half of the card front. Cut/emboss the smalled Grand big scalloped oval from blue paper and adhere on the left of the card front. Mount a strip of ribbon across the middle of the card, covering the seam in the paper. Tie a bow, in matching ribbon and mount to the right of the blue oval.

DIGITAL IMAGE

Size the digital image on your computer to measure 3.75" in height. Print the image on white card stock. I let mine sit for an hour or so to make sure the ink won't run when I color it. Color the image with COPIC markers. I used these colors:

  • Cap/Gown: C3, C5, C7, 100
  • Skirt/Shoes: B21, B23, B24
  • Scarf: R21, R24
  • Skin: E0000, E000, E01
  • Hair: Y38, E35, E37
  • Diplomas: Y21, Y28
  • Book: E09, E34, E37, E39

Enhance the tassel with the gold SPICA pen. Cut/emboss the image using the largest petite oval die, and mount on the blue oval mat on the front of the card.

OTHER IMAGES

Stamp the book, and the word "Congratulations" from the Tassel Time stamp set. Cut out the diploma and graduate head (the "o" and "i" from the word), and the book. Color with COPIC markers.

Color all of the trimmed images with COPIC markers. I used these colors:

  • Cap: C3, C5, C7
  • Skin: E0000, E000, E01
  • Diploma: Y21, Y28
  • Book: E09, E34, E37, E39

Enhance the tassel with the gold SPICA pen. Mount the images on the lower right edge of the main image on the front of the card.

SENTIMENT

Cut/emboss 2 ribbon banners - one in white, and one in blue. Trim the white one to just the inner portion of the banner. Stamp the sentiment in black ink on the white banner. Glue the white piece onto the matching area of the blue banner, and mount the banner in the upper right corner of the card.

Thanks for stopping by!

Blue_Orange

Sunday, November 13, 2011

Chessmen Photo Card

Inspiration

I do a lot of photography, even though I don't post a lot of photos here. Most of my shots are not "people" shots - I like scenic nature vistas most. But I also like macro photography, especially taking pictures of items that provide a different point of view.

Today's card uses a photo I took of an antique chess set that sits on a table in the "Officers' Club" room of the Hangar Hotel in Fredricksburg, TX. It's a cool hotel that is built to look like a WWII hangar on the outside, and a 1940's-style hotel featuring airplane memorabilia, model planes, and USO history. The chess set, made of glass, was catching sunlight from the nearby windows and I got down very close to capture the chessmen receding in focus.

I used the photo to create a birthday card for a friend's father - a long-time Texan turning 80 years old this fall, who loves to play chess and is someone I thought would appreciate the origin of the chess set in the photo. I used a full sheet of card stock to create the base card, so it's a nice big card for an important birthday event!

Hangar Hotel Chessmen

Ingredients

Note: Finished card size is 5 1/2" x 8 1/2"

Paper

Basic Black (SU!)8 1/2" x 11"; score at 5 1/2", and
4 1/4" x 5 3/8
Real Red (SU!)5 1/2" x 7 3/4", and
3/4" x 8 1/2", and
2" x 3
Jackpot DSP (SU!)5 1/2" x 7 1/2", and
1/2" x 4 1/2" (3 pieces)
Very Vanilla (SU!)1/2" x 8 1/2", and
scraps

Inks

Basic Black (SU!)

Stamps

Game Night (SU!)
Floral Wreath (Gina K)
Father's Day Centers (CHF)

Accessories

Cuttlebug (Provo Craft)
Ribbon Tag Trio Shapeabilities (Spellbinders)
Oval Punch (SU!)
Scor-Pal
ATG (Scotch)
Scissors (Cutter Bee)
Rotary trimmer (Fiskars)

Instructions

BASE CARD

Score a sheet of 8 1/2" x 11" at 5 1/2" and fold. Mount a red mat, measuring 5 1/2" x 7 3/4", in the center of the card front. Mount the chess-board patterned paper, measuring 5 1/2" x 7 1/2" on the red mat layer.

PHOTO

Cut three strips of patterned paper with the pawn pattern, measuring 1/2" x 4 1/2". Mount these from the left edge of the base card toward the center, with the first one 1" from the top of the card, and each one 1/8" apart.

Trim the photo to 4" x 5 1/4, and mount on a mat of black paper, measuring 4 1/4" x 5 3/8. Mount the matted photo so that it covers the ends of the pawn paper strips, and leaves some of the chess board mat showing on the right.

CHESS MEN TRIM

Cut/emboss a ribbon tag from red paper. Stamp the sentiment in black ink on ivory paper and punch out with the oval punch. Mount the sentiment on the ribbon tag.

Mount an ivory strip measuring 1/2" x 8 1/2" on a red strip measuring 3/4" x 8 1/2", and slide through the ribbon tag. Mount this across the front of the card.

Finish by stamping the chess men images in black ink on ivory paper. Trim them closely, and mount at varying angles along the ivory "ribbon" on the front of the card.

Thanks for stopping by!

Blue_Orange

Friday, November 11, 2011

Autumn Thinking About You

Inspiration

Here's another autumn card - with one of my favorite fall images - pumpkins! I always use pumpkins practice my shading techniques with COPICs. The Heartfelt Creation pumpkin images from the Pumpkin/Autumn Vines set are perfect for this card, plus they match the Spellbinders Pumpkin dies, so they're easy to cut out in a flash, too.

Autumn Thinking

Ingredients

Note: Finished card size is 5" x 7"

Paper

Early Espresso(SU!)7" x 10"; score at 5"
Autumn Meadows DSP(SU!)4 3/4" x 6 3/4"
Vintage Cream(Papertrey Ink)2" x 3"
Stamper's Select White(Papertrey Ink)5" x 5"

Ink

Memento Rich Cocoa (Tsukineko)

Stamps

HCPC 3383 Cardinal Posy Branch PreCut Set (Heartfelt Creations)
HCPC 3334 Open Falling Leaves PreCut Set (Heartfelt Creations)
HCPC 3330 Elegant Autumn Swirl PreCut Set (Heartfelt Creations)
HCPC 3329 Pumpkin/Autumn Vines PreCut Set (Heartfelt Creations)

Accessories

HCD 707: Falling Leaves Die (Heartfelt Creations)
Pumpkins Nestabilities Die (Spellbinders)
Big Shot Pro (Sizzix)
Scalloped Oval Punch (SU!)
SPICA Markers (Imagination International)
COPIC Markers (Imagination International)
Sponge
3-D Foam Squares (Scrapbook Adhesives)
ATG (Scotch)
Scor-Pal
Scissors (Cutter Bee)
Rotary trimmer (Fiskars)

Instructions

BASE CARD

Start with a piece of brown card stock measuring 7 x 10, score at 5", and fold.

MAT LAYER

Using a deckled blade, cut a piece of designer paper measuring 4 3/4" x 6 3/4". Sponge brown ink around the edges to distress the deckle.

Stamp the Autumn Leaf Swirl image and the pumpkin leaf swirl using brown ink on the mat layer. Color the open areas of the swirls of the Autumn Leaf swirls with a Chocolate SPICA pen, and the open areas of the swirls of the pumpkin leaf swirls with a Turquoise SPICA pen.

Stamp the matching small autumn leaf from the Open Falling Leaves set in brown ink on white card stock 4 times, and cut these out with the matching Falling Leaves die. Color these leaves with COPIC markers: YR12 & E39, and enhance with the Chocolate SPICA pen. Glue them over the upper-most 4 autumn leaves on the mat. Stamp the pumpkin swirl in brown ink on white card stock. and cut out the two leaves. Color them with COPIC markers: BG11 & BG13, and enhance with the Turquoise SPICA pen. Glue them over the pumpkin leaves on the mat. Mount the mat layer on the card front.

PUMPKINS

Stamp the three pumpkins in brown ink on white paper. Cut them out with the matching pumpkin dies. Color with COPIC markers: YR00, YR12, YR18, E39, and enhance with Orange and Chocolate SPICA markers. Glue the largest pumpkin on the card front, then add the two smaller pumpkins using foam squares.

SENTIMENT

Stamp the sentiment in brown ink on cream paper. Punch out with scalloped oval punch, and use a sponge with brown ink to distress the edges of the punched sentiment. Mount in the upper right corner with foam squares.

HC Blog

Don't forget to check out the beautiful creations of the design team at the Heartfelt Creations blog!

Thanks for stopping by!

Blue_Orange

Thursday, November 10, 2011

Nature Laughs

Inspiration

We're right in the middle of autumn - the clocks have "fallen back" and the northeast has already seen snow! And I'm trying to come up with a masculine card for fall birthdays... Trees are always good for masculine cards... Here's the Heartfelt Creations' All Seasons Tree - a beautiful tree that can be colored to fit any season, and today my season is autumn - perfect!!! And, you know, this would work for a feminine autumn birthday, too!

Nature Laughs

Ingredients

Note: Finished card size is 5" x 7"

Paper

Really Rust (SU!)7" x 10"; scored at 5"
More Mustard (SU!)3" x 6 1/2"
2009 Specialty (SU!)3 1/2" x 3 1/2"
Kraft (SU!)4 1/2" x 4 1/2"
Vintage Ivory (Papertrey Ink)2 1/2" x 3"

Ink

Timber Brown (StazOn)
Early Espresso (SU!)
More Mustard (SU!)
Really Rust (SU!)

Stamps

HCPC 3331 All Seasons Tree PreCut Set (Heartfelt Creations)

Accessories

Fleur De Lis Square Nestabilities (Spellbinders)
Labels 18 Nestabilities (Spellbinders)
Cuttlebug (Provo Craft)
Chalks (Koss)
Prong pick-up tool (Excel)
Cotton Pom-poms
Sponges
3-D Foam Squares (Scrapbook Adhesives)
ATG (Scotch)
Scor-Pal
Scissors (Cutter Bee)
Rotary trimmer (Fiskars)

Instructions

BASE CARD

Start with a piece of rust-colored card stock measuring 7" x 10", and score it at 5", and fold. Using a sponge, apply rust-colored ink around all four edges of the card front. Cut a piece of yellow card stock measuring 3" x 6 1/2". Using a sponge, apply yellow ink around all four edges of the yellow card stock. Mount the yellow card strip centered on the front of the card. Cut a square from the brown glittering paper measuring 3 1/2" x 3 1/2". Mount this on the card, so that one point is touching the left edge of the card and one point is touching the top edge of the card.

IMAGE

Cut/emboss the largest Fleur de Lis square from the Kraft card stock. Using a sponge, apply brown ink around all four edges of the die cut to enhance the embossed pattern. Stamp the tree image using StazOn brown ink in the center of the die cut. Apply fall-colored chalks to the tree leaves. Mount the image on the card front, leaving some of the yellow strip showing on the right of the image.

SENTIMENT

Stamp the sentiment in brown ink on ivory paper. Cut/emboss the sentiment using the Label 18 Nestabilities die. Mount to the left of the tree image using foam squares.

HC Blog

Head over to the Heartfelt Creations blog for all the beautiful creations the talented design team members!

Thanks for stopping by!

Blue_Orange

LinkWithin

Blog Widget by LinkWithin