Sunday, April 29, 2012

Inspiration

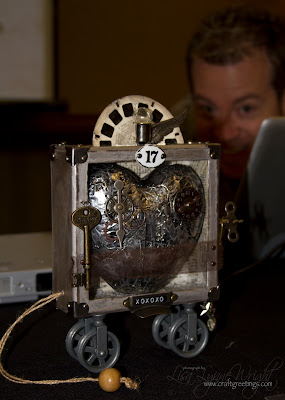
Here's the rest of the pictures from the Tim Holtz workshop I attended last weekend. It was sponsored by the Stamp Asylum store here in Plano, TX. I took my camera the second day to take some pictures of the samples Tim made. While I was taking a shot of his "Heart & Soul" sample, he crouched down behind it, and I captured him in the background! A cool picture that I'll always remember!

TimHoltz

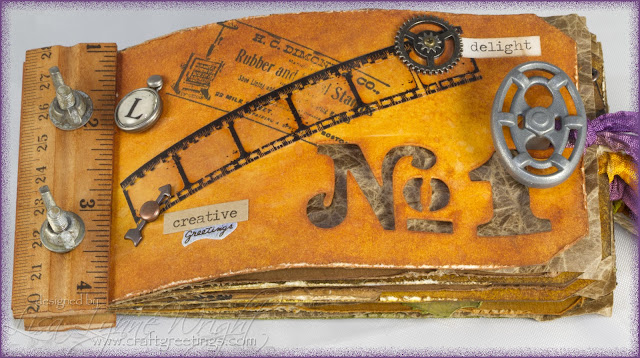
Journeys of the Past

This was a little "memory book" made of tags of various types of paper, so there are pics of 5 of the main pages.

Journey1

Journey2

Journey1

Journey1

Journey5

Configuration of Your Imagination

This was a fun "embellishment" experience! I've got some great ideas for some of the doo-dads I've saved over the years.

ImaginationConfiguration

Thanks for stopping by!

Orange_Green

Wednesday, April 25, 2012

Only One Like You

Inspiration

I'm SO happy to announce that I made the Heartfelt Creations team again!! Working on this has taught me so much about crafting, and about how WELL a business can run a design team - the Heartfelt Creations company treats their design team members as family and treats us all with kindness and generosity - I cannot say enough about what a wonderful experience this has been, and how thrilled and honored I am to be allowed to continue. Thank you to Emma Lou and Linda and all the folks at HC, and another thank you to of you who voted for me to continue!

And congratulations to all the new design team members! Be sure to head over to the HC Blog to check out the announcement.

My card today is made using the Western Elements collection - there are such beautiful scenery elements in this collection! They do inspire me to try my hand at watercolor.

OnlyOneLikeYou

Ingredients

Note: Finished card size: 6" x 6"

Heartfelt Creations Products

Paper

Bordering Blue (SU!)6" x 12", scored at 6", and
3" x 3"
Tattered and Worn (Paper Studio)4" x 5"
Watercolor Paper (Canson)6" x 6", and
3" x 3"

Ink

Sepia Archival Ink (Ranger)
Distress Ink (Ranger), Vintage Photo, Weathered Wood, Peeled Paint
Distress Re-Inkers (Ranger): Broken China, Crushed Olive, Mustard Seed, Barn Door, Pumice Stone, Tea Dye, Dusty Concord

Accessories

Labels 1 Grand Nestabilities (Spellbinders)
Labels 1 Nestabilities (Spellbinders)
Grand Calibur (Spellbinders)
Tim Holtz Detail Water Brush (Ranger)
Sponge
3-D Foam Squares (Scrapbook Adhesives)
Scissors
Zip-Dry
ATG (3M)
Scor-Pal
Rotary Trimmer (Fiskars)

Instructions

BASE CARD

Start with a piece of blue card stock measuring 6" x 12", score at 6" and fold. Position the 6" Grand Label 1 die just over the fold, then cut and emboss to create the card base. Distress the edges with Weathered Wood and Vintage Photo inks on a sponge.

IMAGE LAYER

Cut/emboss a piece of watercolor paper using the next smaller Grand Label 1 die. Using the Sepia ink, stamp the mountain scene image on the upper half of the watercolor paper die cut. Use Peeled Paint ink to randomly stamp grass and small mushroom image around the bottom half of the watercolor paper die cut. Use the distress re-inkers to watercolor the image. When it's dry mount it to the front of the card.

FOREGROUND IMAGES

Stamp the fence and sign on the brown patterned paper using Sepia ink. Use the matching die to cut out the fence, and carefully trim the sign with scissors. Stamp the mushrooms on watercolor paper using Sepia ink, then watercolor them using re-inkers. Carefully trim them using scissors. Mount the fence and mushrooms on the card front using Zip Dry. Add the sign and remaining mushrooms using 3-D squares.

SENTIMENT

Cut/emboss blue card stock using the next-to-smallest Label 1 die, and watercolor paper using the smallest Label 1 die. Lightly distress the edges of both pieces with Weathered Wood and Vintage Photo inks on a sponge. Stamp the sentiment on the watercolor die cut, then mount it on the blue die cut. Add the sentiment to the upper right corner of the card front using 3-D foam squares.

Thanks for stopping by!

Orange_Green

Sunday, April 22, 2012

Look What I Made!

Inspiration

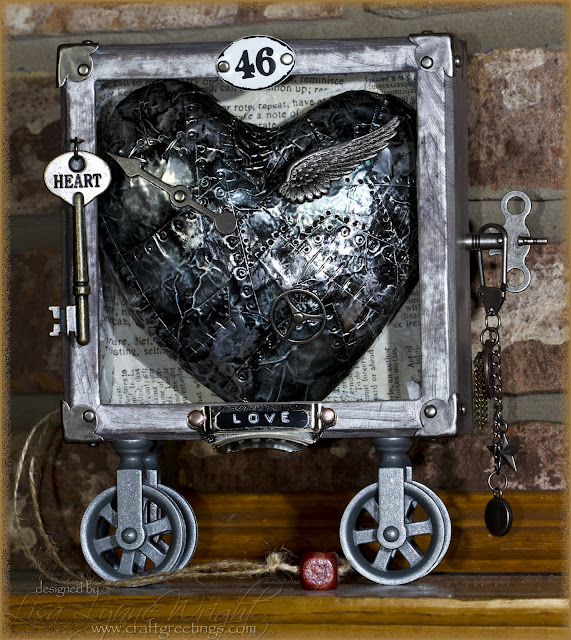
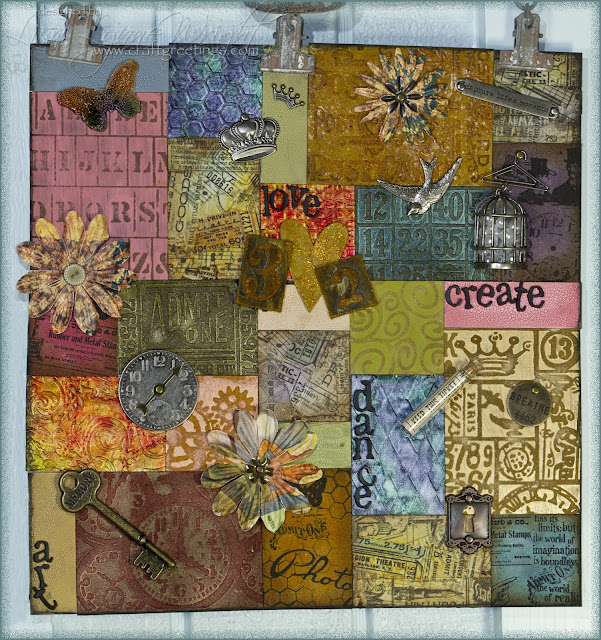
Good morning! I'm enjoying the live class with Tim Holtz SO MUCH! It's sponsored by the Stamp Asylum store here in Plano, TX. I went to the "Heart and Soul" and the "Patchwork Pandemonium" classes yesterday, and am back for 2 more classes today. So, no card today because no time to write instructions this week - just the outcome from my incredible experience yesterday. I'll share what I make today later this week. If you EVER get a chance to attend a class with Tim, don't pass it up - it is worth every moment (and every penny)!

Heart And Soul

HeartAndSoul

Patchwork Pandemonium

PatchworkPandemonium

Thanks for stopping by!

Orange_Green

Friday, April 20, 2012

Vintage Carriage

Inspiration

Hello and Happy Friday!!!!! I'm so glad to see this week end - big project at work with lots of hours all week! And, best of all, I'm headed to craft classes Saturday and Sunday taught by TIM HOLTZ IN PERSON!!! Yea!

This is my third Heartfelt Creations card this week - they keep getting simpler and simpler, don't they? This card probably has the shortest list of accessories I've ever published. The card is simply layers of paper, and a single silhouette image. When I found this patterned paper, I knew it was perfect for this carriage - and in this case, simple is good!

VintageCarriage

Ingredients

Note: Finished card size: 5" x 7"

Heartfelt Creations Products

Paper

Kraft (SU!)7" x 10", scored at 5"
More Mustard (SU!)4 3/4" x 6 3/4"
Tattered and Worn DSP (Paper Studio)4 5/8" x 6 5/8"
Brown (CTMH)2 1/8" x 4 1/8"
Naturals Ivory (SU!)2 1/2" x 4 1/2"

Ink

Vintage Photo Distress Ink (Ranger)

Accessories

Long Rectangles Nestabilities - Small (Spellbinders)
Grand Calibur (Spellbinders)
ATG (3M)
Scor-Pal
Rotary Trimmer (Fiskars)

Instructions

BASE CARD and MAT

Cut a piece of kraft card stock measuring 7" x 10", score at 5" and fold. Cut a piece of dark yellow card stock measuring 4 3/4" x 6 3/4", and mount on the card front. Cut a piece of patterned paper measuring 4 5/8" x 6 5/8", and mount on the yellow mat.

IMAGE

Stamp the carriage on a piece of natural ivory card stock. Cut/emboss the image using the long rectangle that is 2" x 4". Cut a piece of brown card stock measuring 2 1/8" x 4 1/8". Mount the image on the brown mat, and mount the image in the middle of the card front.

Thanks for stopping by!

Orange_Green

Thursday, April 19, 2012

Cheery Thoughts

Inspiration

Here's my second Heartfelt Creations card this week - I decided to try out the Re-Inker watercolor technique from the Tim Holtz online class. This technique is really fun and easy - it just takes a little water to correct! I used another image from the Western Elements Collection.

CheeryThoughts

Ingredients

Note: Finished card size: 4 1/2" x 6"

Heartfelt Creations Products

Paper

Perfect Plum (SU!)6" x 9"
Wild Wasabi (SU!)4 1/4" x 5 3/4", and
1 1/2" x 3 1/4"
Perfect Plum DSP (SU!)1 3/4" x 5 5/8"
Green Tea DSP (SU!)1 3/4" x 4 1/8"
Stamper's Select White (PTI)1 1/2" x 3 1/4"
Watercolor Paper (Canson)2 1/8" x 3 3/4"

Ink

Archival Sepia (Ranger)
Perfect Plum (SU!)
Distress Re-Inkers (Ranger): Crushed Olive, Mustard Seed, Barn Door, Tea Dye, Dusty Concord

Accessories

Grommet Tags Shapeabilities (Spellbinders)
Petite Oval Nestabilities - Large (Spellbinders)
Grand Calibur (Spellbinders)
Brads (Paper Studio)
Detail Water Brush (Ranger)
Crop-A-Dile (We R Memory Keepers)
ATG (3M)
Scor-Pal
Rotary Trimmer (Fiskars)

Instructions

BASE CARD

Cut a piece of purple card stock measuring 6" x 9", score at 4 1/2" and fold.

MAT

Cut a piece of green card stock measuring 4 1/4" x 5 3/4". Cut a piece of purple patterned paper measuring 1 3/4" x 5 5/8", and a piece of green patterned paper measuring 1 3/4" x 4 1/8". Mount the purple paper strip across the long edge of the green mat. Mount the green paper strip along the short edge of the green mat.

SENTIMENT

Cut/emboss a green tag, and a small oval that fits on the tag. Stamp the sentiment in purple ink on the white oval. Mount the white oval onto the green tag. Mount the tag, lining up the middle of the tag along the line where the 2 patterned papers cross, and punch a hole through the holes in the ends of the tag. Put a purple brad through the holes. Mount the mat on the front of the card.

IMAGE

Cut a piece of watercolor paper measuring 2 1/8" x 3 3/4". Stamp the image with waterproof ink. Use the water brush and small amounts of re-inker to watercolor the image. When dry, mount the image in the upper right of the card front.

Thanks for stopping by!

Orange_Green

Wednesday, April 18, 2012

I Believe In You

Inspiration

IBelieveInYou


It's Heartfelt Creations Wednesday again, and if you can believe it we're down to the last two weeks of posts from the current design team! I'm sending a very sincere thank you to the folks that voted for me to continue - we're all holding our breath until next week's announcement. This 6-month term has flown by, and been full of beautiful creations from a group of really talented ladies! Be sure to head over to the HC blog to see their inspiring creations, and to find out the lucky winner of the Western Elements Collection.


Here's my first card this week - I have 3, so stop by tomorrow and Friday, too! I used one of the small flowers from the Woodland Growth set, and dressed it up with Flower Soft.


Ingredients

Note: Finished card size: 4" x 9" - fits in a standard business envelope

Heartfelt Creations Products

Paper

Elegant Eggplant (SU!)8" x 9", and
2" x 3" - 3 pieces, and
1 1/2" x 3 3/4"
So Saffron DSP (SU!)3 3/4" x 8 3/4"
Stamper's Select White (PTI)2" x 3" - 3 pieces, and
3/8" x 2 1/4"

Ink

Memento Rich Cocoa (Tsukineko)
Certainly Celery (SU!)

Accessories

Fleur De Lis Rectangle Nestabilities (Spellbinders)
Classic Rectangle Nestabilities - Large (Spellbinders)
Grand Calibur (Spellbinders)
Certainly Celery Ribbon (SU!)
COPIC Markers (Imagination International)
Lavender Flower Soft
Flower Soft Glue
Zip Dry Glue
ATG (3M)
Scor-Pal
Rotary Trimmer (Fiskars)

Instructions

BASE CARD

Cut a piece of dark purple card stock measuring 8" x 9", score at 4" and fold.

MAT

Cut a piece of patterned yellow paper measuring 3 3/4" x 8 3/4". Cut a piece of green ribbon and mount on the left side of the paper mat. Mount the mat on the front of the card.

SENTIMENT

Cut/emboss the fancy tag out of dark purple card stock. Cut a piece of white card stock measuring 3/8" x 2 1/4". Stamp the sentiment in green ink. Glue the sentiment onto the tag, and mount the tag at the bottom of the mat on the card front.

IMAGES

Cut/emboss 3 dark purple Fleur De Lis rectangles, and cut/emboss 3 white classic rectangles. Stamp the image in brown ink on each of the three white rectangles. Color the leaves and grass with G40 and G43 COPIC markers. Mount the images onto the dark purple rectangles, and mount these onto the card front, starting near the top and overlapping the vertical ribbon.

Cover the blooms in each image with Flower Soft glue, and cover in lavender Flower Soft. Press with your finger, then shake off the excess. Tie a green ribbon bow and glue to the corner of the bottom image.

Thanks for stopping by!

Orange_Green

Sunday, April 15, 2012

Spring Bird

Inspiration

Good Sunday to you and Happy Tax Day! LOL - well, I guess you actually have one more day....

Here's an easy card that I made using a sketch from a sketch group I belong to called CardSketchesByZacksNana. We're just a small group of ladies that trade cards once a month and the cool part is that we have friends now in Austrailia and Canada and the US! Lots of fun.

SpringBird

Ingredients

Note: Finished card size: 4 1/4" x 5 /12"

Stamps

Asian Artistry (SU!)

Paper

Basic Gray (SU!)5 1/2" x 8 1/2", scored at 4 1/4", and
1 3/4" x 4 1/4"
Walk in the Park DSP4 1/8" x 5 3/8"
Pretty in Pink1 1/2" x 4 1/4", and
4 1/2" x 5 1/2"
Whisper White4 1/2" x 5 1/2"

Ink

Basic Gray (SU!)

Accessories

Scalloped Petite Oval - Large - Nestabilities (Spellbinders)
Petite Oval - Small - Nestabilities (Spellbinders)
Grand Calibur (Spellbinders)
Ribbon (Hobby Lobby)
Becca's Peg Bow Maker (ODBD)
ATG (3M)
Zip Dry Glue
Scor-Pal
Rotary Trimmer (Fiskars)

Instructions

BASE CARD and MAT

Cut a piece of gray card stock measuring 5 1/2" x 8 1/2", score at 4 1/4", and fold. Cut a piece of patterned paper measuring 4 1/8" x 5 3/8", and mount on the front of the card.

IMAGE

Cut/emboss a large scalloped oval from pink card stock. Cut/emboss a plain oval just smaller than the pink oval. Mount the white oval onto the pink oval.

Stamp the image with gray ink at one end of the oval. Cut the oval just to the left of the image, and mount on the left side of the card.

Bow Trim

Cut a piece of gray card stock measuring 1 3/4" x 4 1/4", and a piece of pink card stock measuring 1 1/2" x 4 1/4". Mount the pink strip onto the gray. Mount a strip of white ribbon around strip length-wise, putting a twist in the ribbon at the point you will mount the bow. This creates the illusion that you tied the bow around the strip.

Tie a pretty bow using the peg bow maker, trim the ends, and glue the bow over the twist in the ribbon.

Thanks for stopping by!

Orange_Green

Thursday, April 12, 2012

Simply The Best

Inspiration

Here's another card from the new Western Elements Collection from Heartfelt Creations. I used the sketch SC376 on Splitcoast Stampers for the layout.

As always with a new release, leave a comment on the HC blog by April 17 to be eligible to win the entire release valued at $109.99. The winner will be announced on April 18 on the HC Blog.

SimplyTheBest

Ingredients

Note: Finished card size: 5" x 7"

Heartfelt Creations Products

Paper

Marina Mist (SU!)7" x 10", scored at 5"
So Saffron (SU!)4" x 4"
Early Espresso (SU!)4" x 5 1/2", and
1 3/4" x 2 3/4"
Old Olive (SU!)3 3/4" x 5 1/4"
Huckleberry Pond Patterned Paper (The Paper Loft)3 1/8" x 3 3/4"
Vintage Ivory (PTI)2 7/8" x 3 1/2", and
1 3/4" x 2 3/4"

Ink

Memento Rich Cocoa (Tsukineko)
Distress Ink (Ranger): Tumbled Glass, Wild Honey, Crushed Olive

Accessories

Pinking Circles Nestabilities (Spellbinders)
Petite Ovals Large Nestabilities (Spellbinders)
Petite Ovals Small Nestabilities (Spellbinders)
Flora M-Bollabilities Folder (Spellbinders)
Grand Calibur (Spellbinders)
Ink Blender with foam (Ranger)
COPIC Markers (Imagination International)
ATG (3M)
Scor-Pal
Rotary Trimmer (Fiskars)

Instructions

BASE CARD

Cut a piece of blue card stock measuring 7" x 10", score at 5" and fold. Darken the edges of the card front with Tumbled Glass ink and the blending tool.

SUN

Cut/emboss a piece of yellow card stock with the largest pinking circle die. Darken the edges of the circle with Wild Honey ink and the blending tool. Mount on the upper right corner of the card front.

MAT

Cut brown card stock to 4" x 5 1/2". Cut green card stock to 3 3/4" x 5 1/4". Ink the raised side of the embossing folder with Crushed Olive, and emboss the green card stock piece. Mount the embossed green card stock onto the brown card stock, and mount on the left lower part of the card front.

IMAGE

Stamp the image with Rich Cocoa ink onto a piece of ivory card stock measuring 2 7/8" x 3 1/2". Color with COPIC markers

  • LAKE: B91, B93
  • SHORE/ROAD: E11, E13
  • HOUSE: E43, E47, Y21, Y26
  • CHIMNEY: E09; BOAT: E17, E19
  • GRASS: YG91, YG95
  • BUSHES: YG61, YG67
  • PINE TREES: G24, G28
  • MOUNTAINS: BG93, BG99
  • SKY: Y21

Mount the scene on a piece of patterned paper measuring 3 /138" x 3 3/4". Mount this in the center of the embossed green mat.

SENTIMENT

Stamp the sentiment in Rich Cocoa on ivory card stock. Cut/emboss with the smallest Petite Oval - Large die. Cut/emboss brown card stock with the next size of Petite Oval - Small die. Mount the ivory oval onto the brown oval, and upper right corner of the image stack.

Remember

It is only a few more weeks until Heartfelt Creations chooses a new design team - the team will be announced April 25th. This time, they are asking YOU to help them decide on the team - they would like your votes for your top 5 CURRENT design team members, AND your votes for the top 5 SEMI-FINALISTS. Your votes will determine the style of creations you will be seeing on the blog for the next 6 months!

Thanks for stopping by!

Orange_Green

Wednesday, April 11, 2012

Nobody Else

Inspiration

The second Wednesday of the month is always fun with Heartfelt Creations! It's NEW RELEASE day!! The Western Elements Collection is new this month, and coordinates beautifully with last month's release. There are 5 new PreCut Stamp Sets and one beautiful new exclusive Spellbinders die designed for Heartfelt Creations.

As always with a new release, leave a comment on the HC blog by April 17 to be eligible to win the entire release valued at $109.99. The winner will be announced on April 18 on the HC Blog.

And remember that it is only a few more weeks until Heartfelt Creations chooses a new design team - the team will be announced April 25th. This time, they are asking YOU to help them decide on the team - they would like your votes for your top 5 CURRENT design team members, AND your votes for the top 5 SEMI-FINALISTS. Your votes will determine the style of creations you will be seeing on the blog for the next 6 months!

Here's my first card with the new release. I used another technique from the Tim Holtz Creative Chemistry 101 class - creating a blended background using Distress Stains.

EasterBasket

Ingredients

Note: Finished card size: 5" x 7"

Heartfelt Creations Products

Paper

Kraft (SU!)7" x 10", scored at 5"
Watercolor Paper (Canson)4 1/2" x 6 1/2"
Early Espresso (SU!)1 1/4" x 3 3/4"
Vintage Ivory (PTI)4 1/4" x 5 1/2", and
1" x 3 1/2"

Ink

Jet Black Archival (Ranger)
Sepia Archival (Ranger)
Distress Stains (Ranger): Broken China, Dusty Concord, Crushed Olive, Wild Honey
Distress Ink (Ranger): Vintage Photo, Pumice Stone, Black Soot

Accessories

Stamp-A-Ma-Jig stamp positioner
Heat Gun
Colored Pencils (Prisma Color)
Gamsol
Paper stubs
Chocolate SPICA pen (Imagination International)
Ink Blender with foam (Ranger)
Mister (Ranger)
Brad
Paper Piercer
Scissors
Scor-Pal
Rotary Trimmer (Fiskars)

Instructions

BASE CARD

Cut a piece of kraft card stock measuring 7" x 10", score at 5" and fold.

BACKGROUND

Cut a piece of watercolor paper measuring 4 1/2" x 6 1/2". Mist with water, then spread Distress Stain ink to create a landscape: Broken China, then Dusty Concord, then Crushed Olive, and fill in with Wild Honey. Dry with heat gun. Use the blender tool to add Vintage Photo ink around the edge of the background.

IMAGES

Stamp the fence and ground images in Sepia ink on the background. Stamp the windmill tower in jet black. Stamp the fence again onto a piece of ivory card stock, and trim closely. Color with colored pencils, and blend with Gamsol on a paper stub. Stamp the boot image twice in Sepia on ivory card stock. Cut the images out with the matching die. Color with colored pencils, blend with Gamsol, and decorate with Chocolate SPICA pen.

Stamp the solid windmill blade in Pumice Stone on ivory paper. Use the stamp positioner to stamp in Black Soot the windmill blade outline over the solid image. Use the matching die to cut out the blade. Use a paper piercer to put a hole through the stamped windmill blade, and through the background at the top of the tower. Fasten the blade to the background using a silver brad. Use Zip Dry to glue the fence onto the background, and glue the boots to the picture, as well.

SENTIMENT

Cut a brown card stock piece measuring 1 1/4" x 3 3/4", and an ivory card stock piece measuring 1" x 3 1/2". Stamp the sentiment in Sepia onto the ivory piece. Mount the sentiment onto the brown piece, then mount this to the upper left of the card front.

Thanks for stopping by!

Orange_Green

LinkWithin

Blog Widget by LinkWithin